Everything you need to know before beginning your own NeoTimber® composite fencing installation.
Before receiving your NeoTimber® fencing, we recommend getting up to scratch with all things you’ll need to consider prior to installation. From handling the material, to recommended tools for the job, as well as more information on the product and the finish, our pre-installation guide is vital in ensuring you have a head start prior to commencing your composite fence installation.
Handling Your Fencing
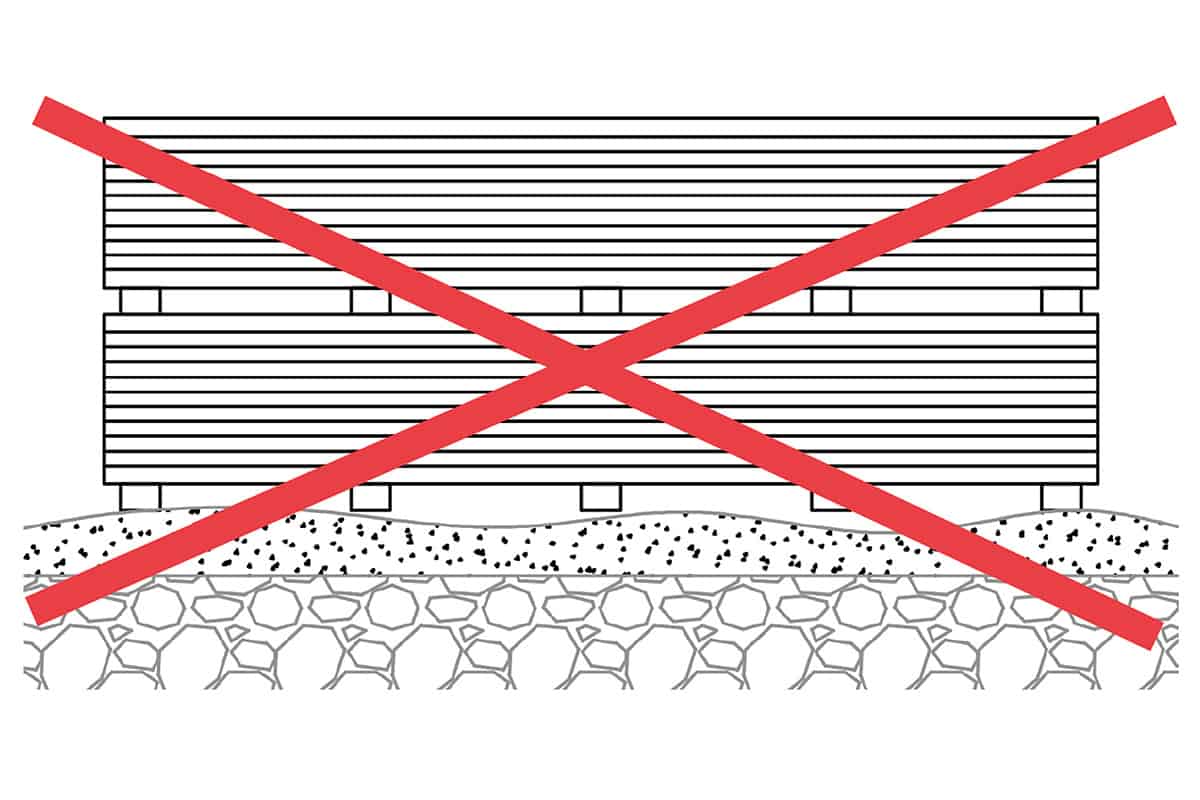
It is important to make sure that you create a flat, clear area to store your fencing boards before install. Laying your composite fencing boards and any fencing components onto wooden battens at approximately 400-500mm spacings will ensure that the composite material avoids sitting water, dirt or grit that can scratch or damage the boards prior to installation. If you are storing any fencing boards outside, make sure to cover them with a protective sheet to prevent damage. Avoid leaning your fence boards up against surfaces for an extended amount of time in order to avoid the product bowing.
Take extra precautions when moving, lifting or fitting your fencing boards to avoid accidental surface scratching. Do not drag, drop or slide the fence boards when laying them on top of one another. Make sure to keep your working area as clean and tidy as possible. This will help to keep the surface of your fencing boards clear of any construction dust and debris.

Pre-Planning
Considerations of your fencing design should be taken well before purchasing your materials. Your fence board requirements and the number of fence posts you will need to complete the project will be heavily dependent on not only the overall linear metreage of fencing required, but your desired design, too. Consider the number of individual runs that your fencing design will include, as well as its height. To help work out your requirements, contact our sales team or use our handy online composite fencing calculators.
Colour
The fencing colour tone of both the Deluxe and Slatted composite fencing ranges come in a dual-tone appearance and therefore shall slightly vary from board-to-board to mimic a more distinctive, authentic, real wood finish. Consideration of this should be taken upon installation. As a manufactured product that is made of natural materials, it is to be expected that there will be a level of batch variation between NeoTimber® fencing products. This should also be taken into consideration when purchasing your fencing materials.
Post Options
NeoTimber’s different post options allow for a wide range of fencing applications: including post installation on soft or hard ground, as well as retro-fit options with a concrete and timber post insert. While the composite fence post is supplied in 1.8m lengths, lower height panels can be achieved and the height of your post can be amended simply by cutting down our composite post material. Our concrete fence post inserts and timber fence post inserts come supplied in 1.8m lengths and can also be cut down with the correct cutting equipment.
Texture
The texture and finish of our composite fencing products varies between our two ranges. Slatted boards are finished with the same brushed finish on both sides of the board. The Deluxe is a two-sided product, with an embossed finish on one side of the board and a brushed finish on its reverse side. NeoTimber® recommend building your composite fence panels in a uniform manner with the same finish facing the same direction. Care should be taken when installing the boards as to avoid inconsistencies in the finish across a panel.
Need Further Support or Advice?
If you’ve still got questions that have not been answered here, or you would like additional advice,
support or assistance then please give one of our friendly experts a call and we’ll be happy to help.
Just give us a call on 01530 382 180.