NeoTimber® don’t over-complicate the process of installing composite cladding with their simple fixing method.
NeoTimber’s easy-to-use, no-thrills fixing method involves fixing the composite cladding boards directly to your network of joists using our purpose-built starter clips and cladding screws. Each of NeoTimber’s cladding ranges can be installed both horizontally and vertically – this guide shall provide step-by-step details on each method.
Fitting Composite Cladding Boards
You can install composite cladding either vertically or horizontally. While the orientation of both the joists and the cladding boards change depending on the direction you wish to install them, the installation methods behind each are effectively the same. The step-by-step installation guide will focus on the horizontal installation of our cladding boards and the same principles and instructions for installation can be used for vertical installation methods as summarised below.
Horizontal Installation Of Cladding Boards
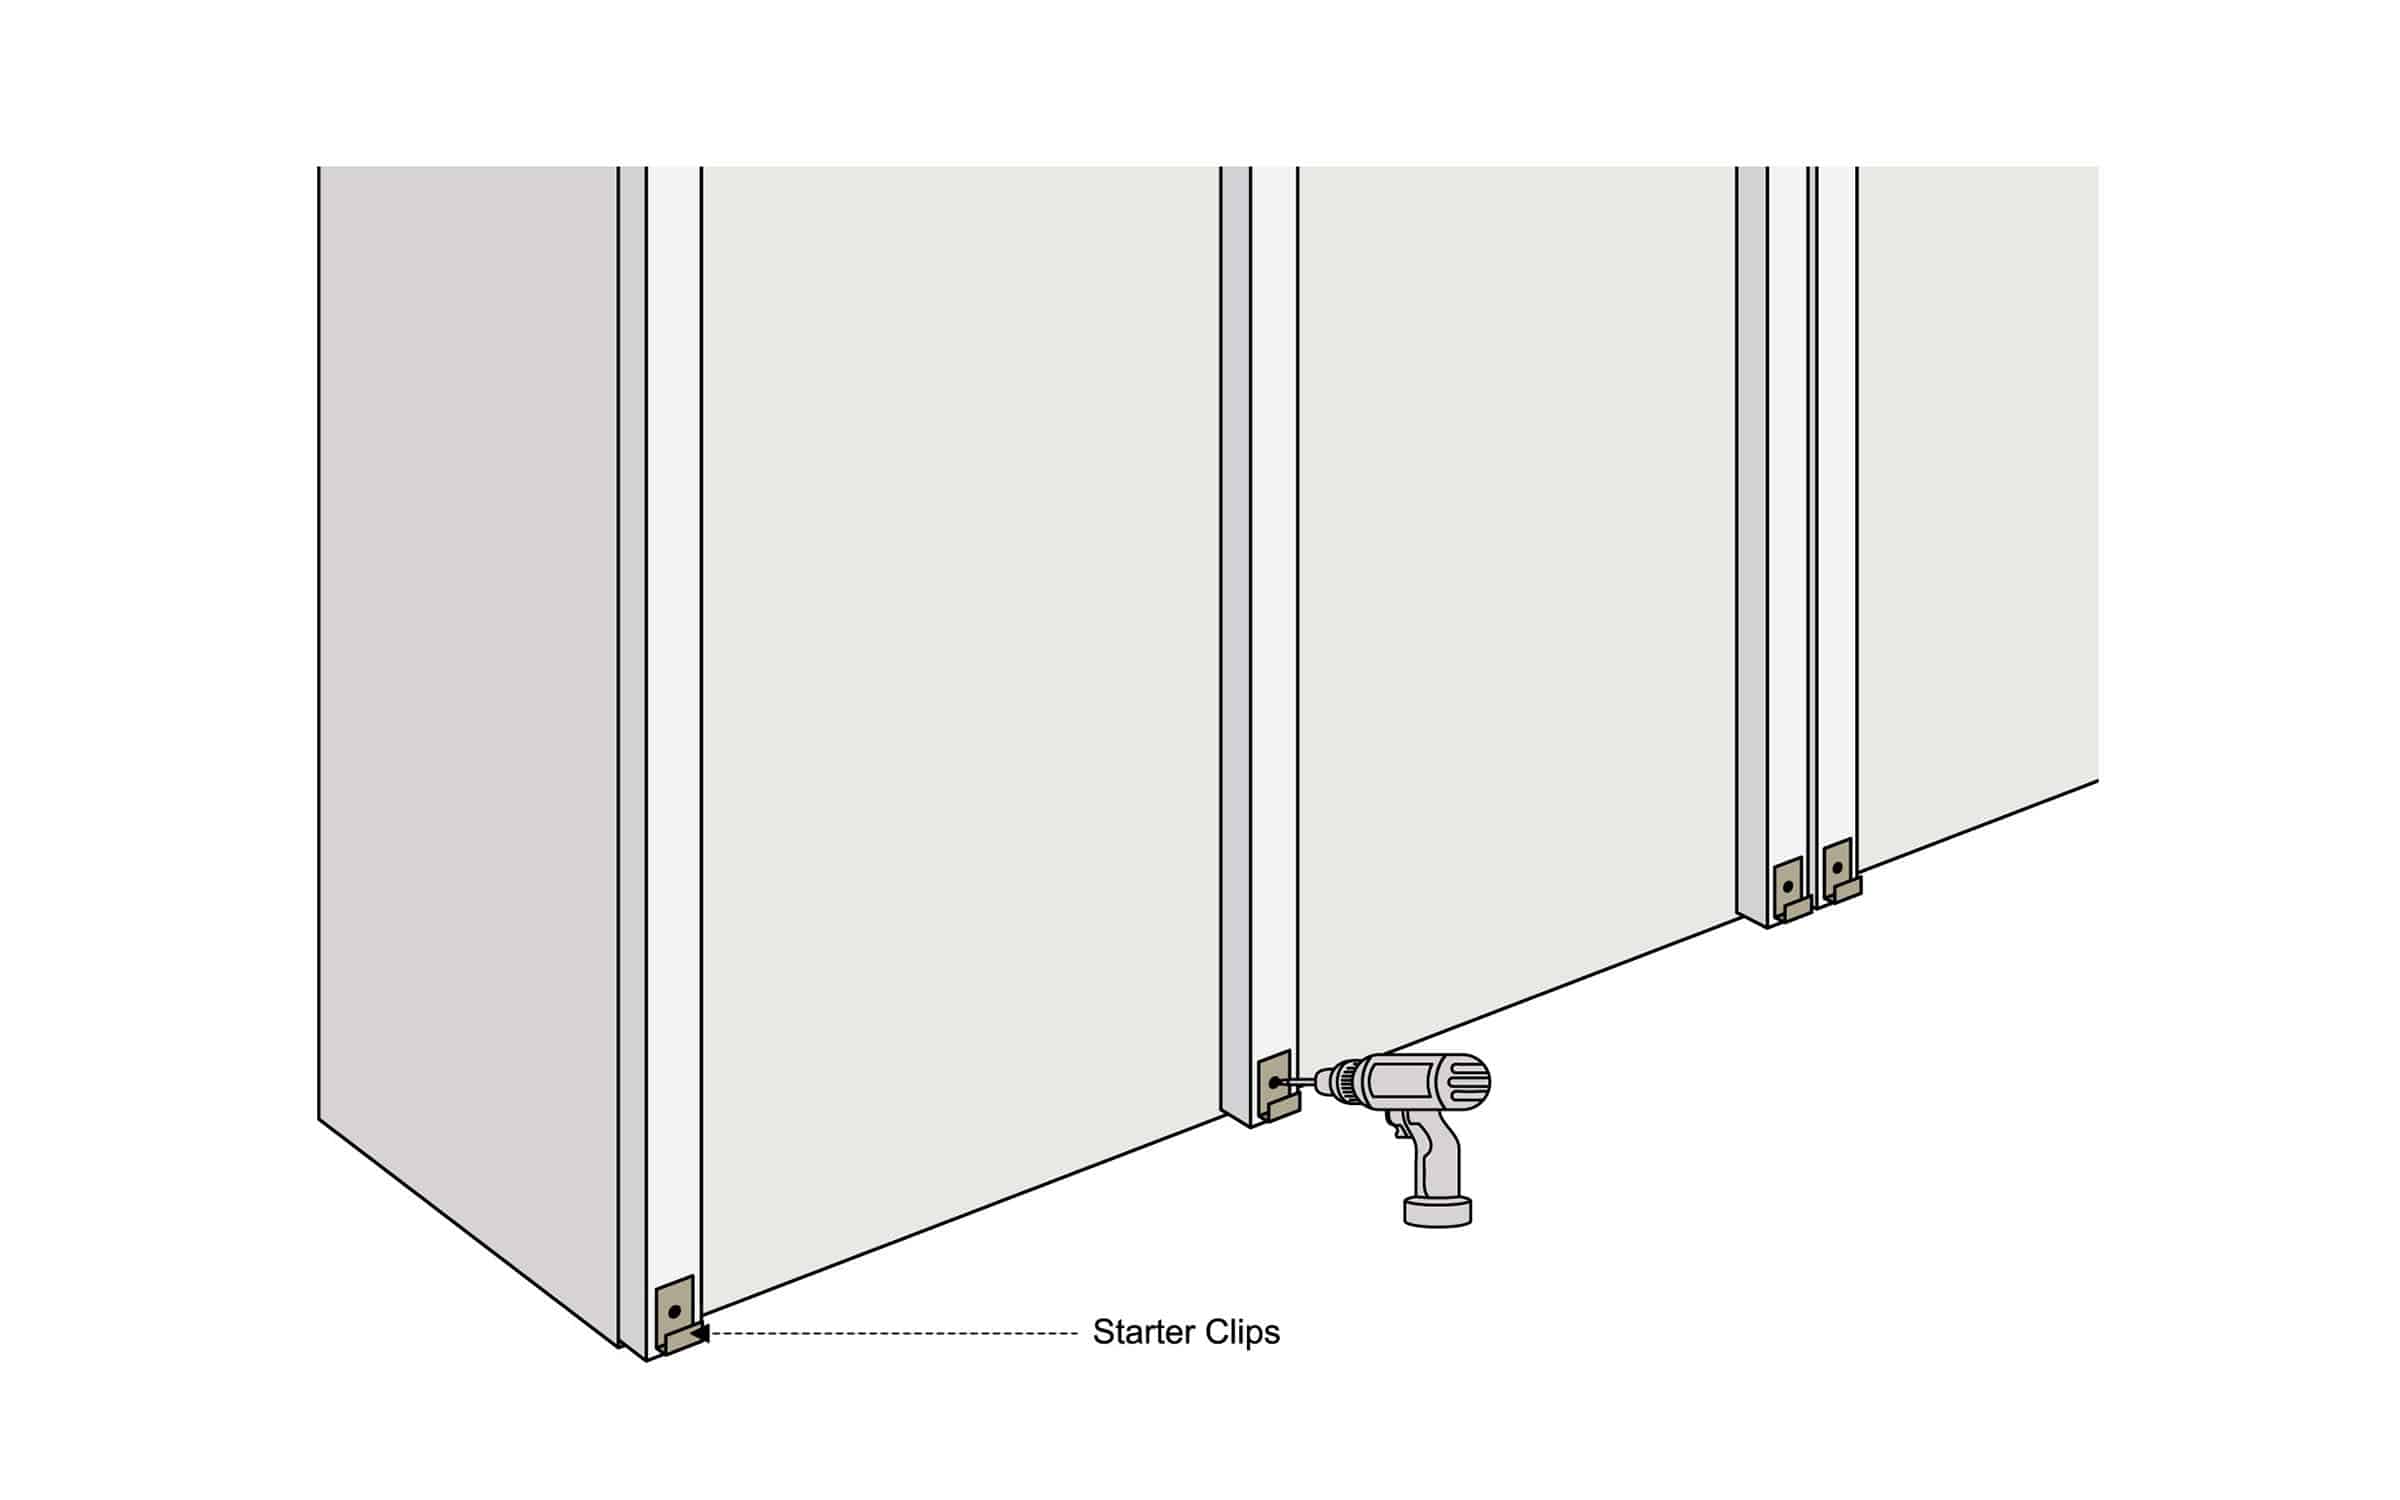
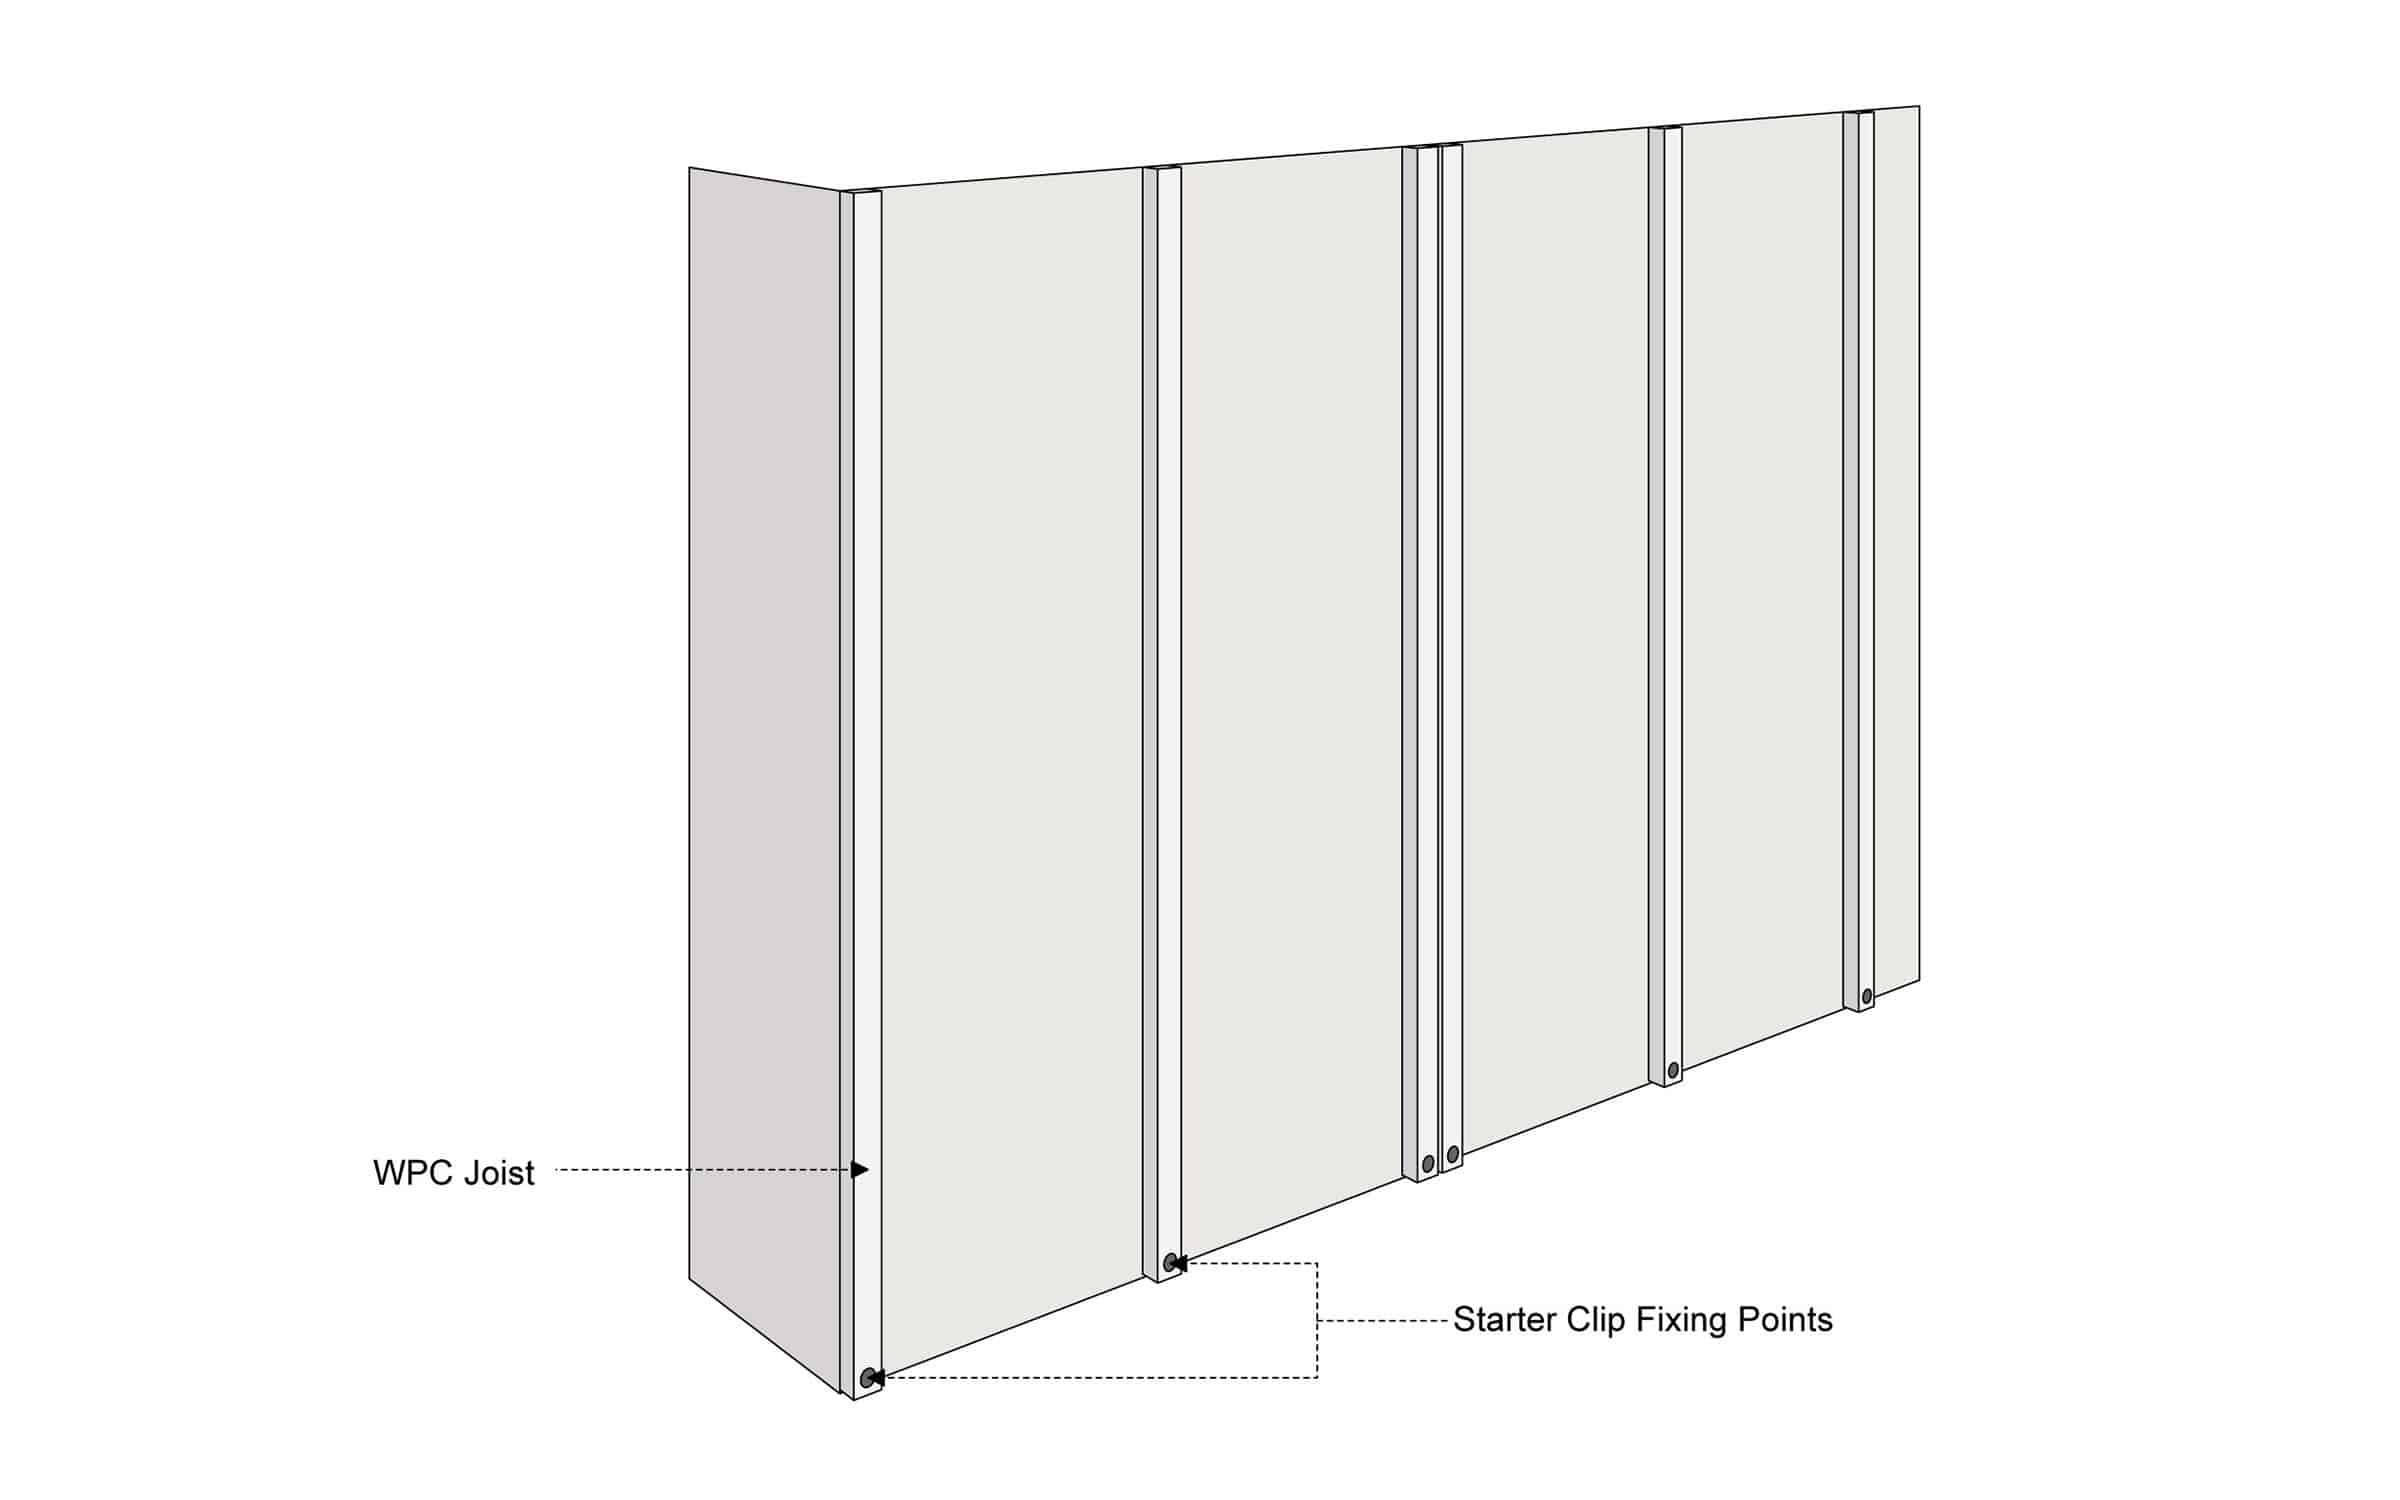
Step 1. Align & Securely Fix Your Starter Clips To Your First Run Of Joists
Begin by attaching NeoTimber® Starter Clips to the base of each of your joists using the stainless-steel screws provided. It is important that you mark a level line to ensure a straight row of Starter Clips are evenly fixed to your row of joists. Position and securely fix a Starter Clip at the base of each joist to ensure your first cladding board is secure.
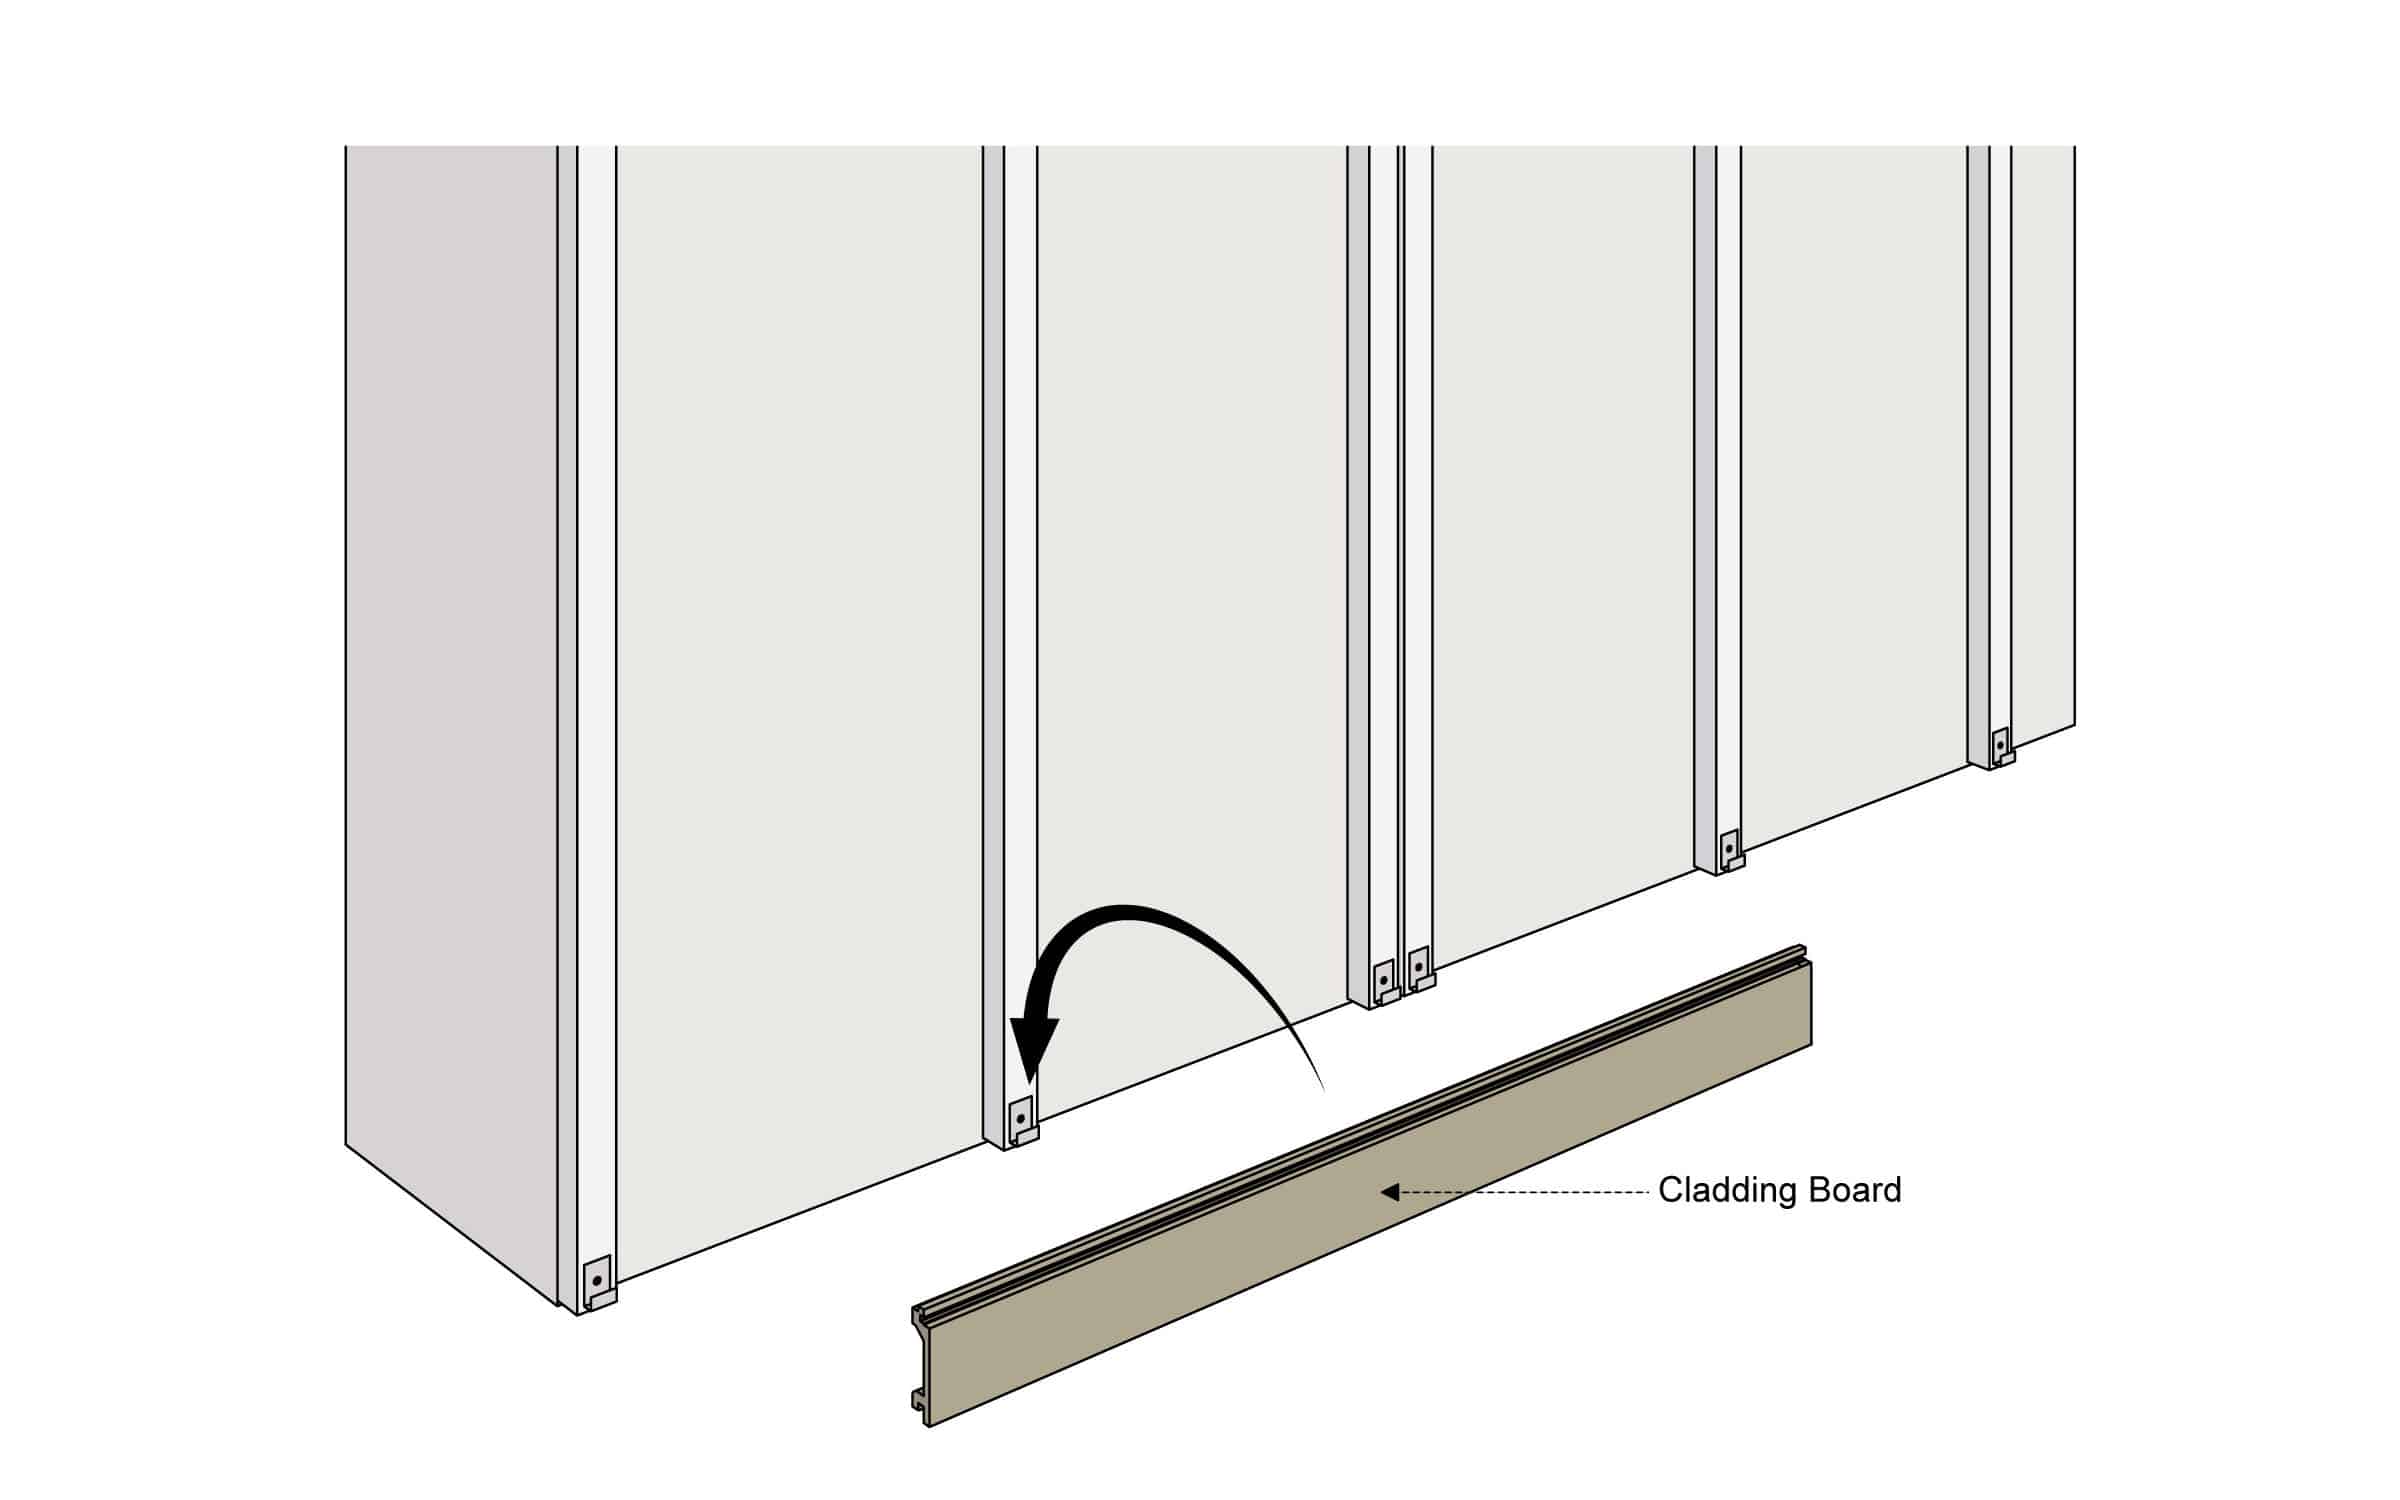
Step 2. Fix Your First Cladding Board
When all Starter Clips are fixed to the base of the joists, align the concealed groove of your first composite cladding board with the opening of your Starter Clips and position the cladding board into place. If required, tap the top of the cladding board to ensure it is securely fixed into the full run of clips.
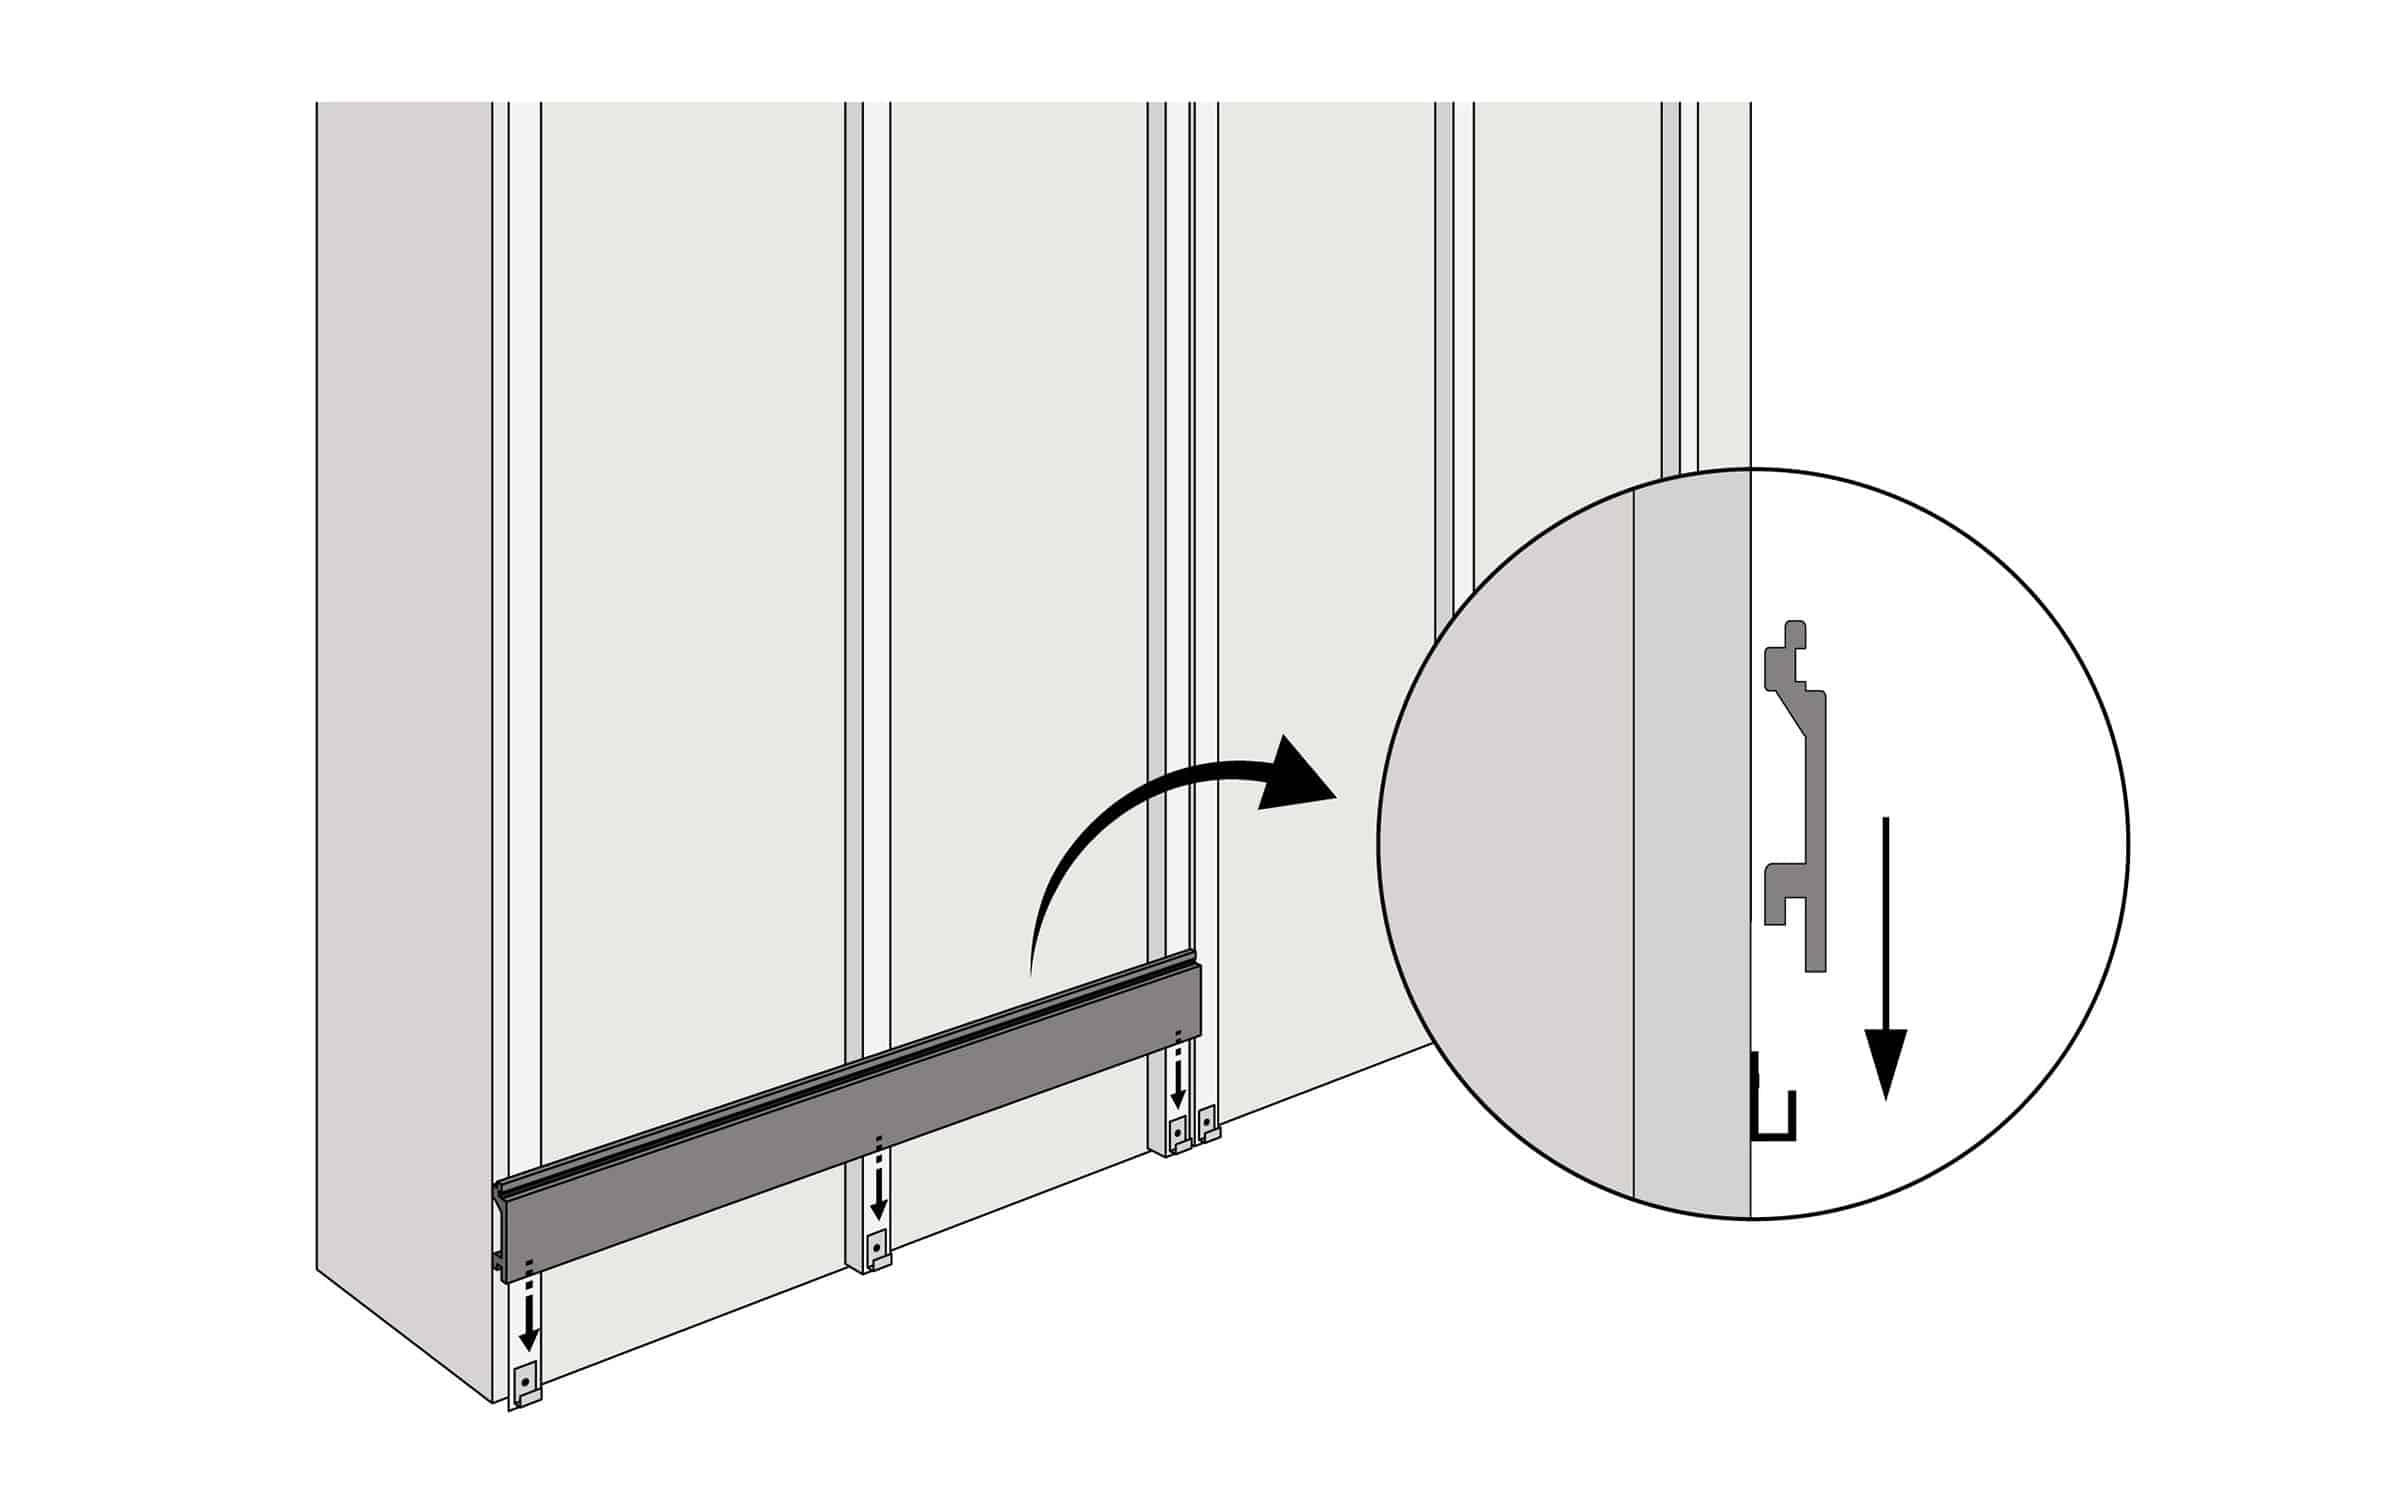
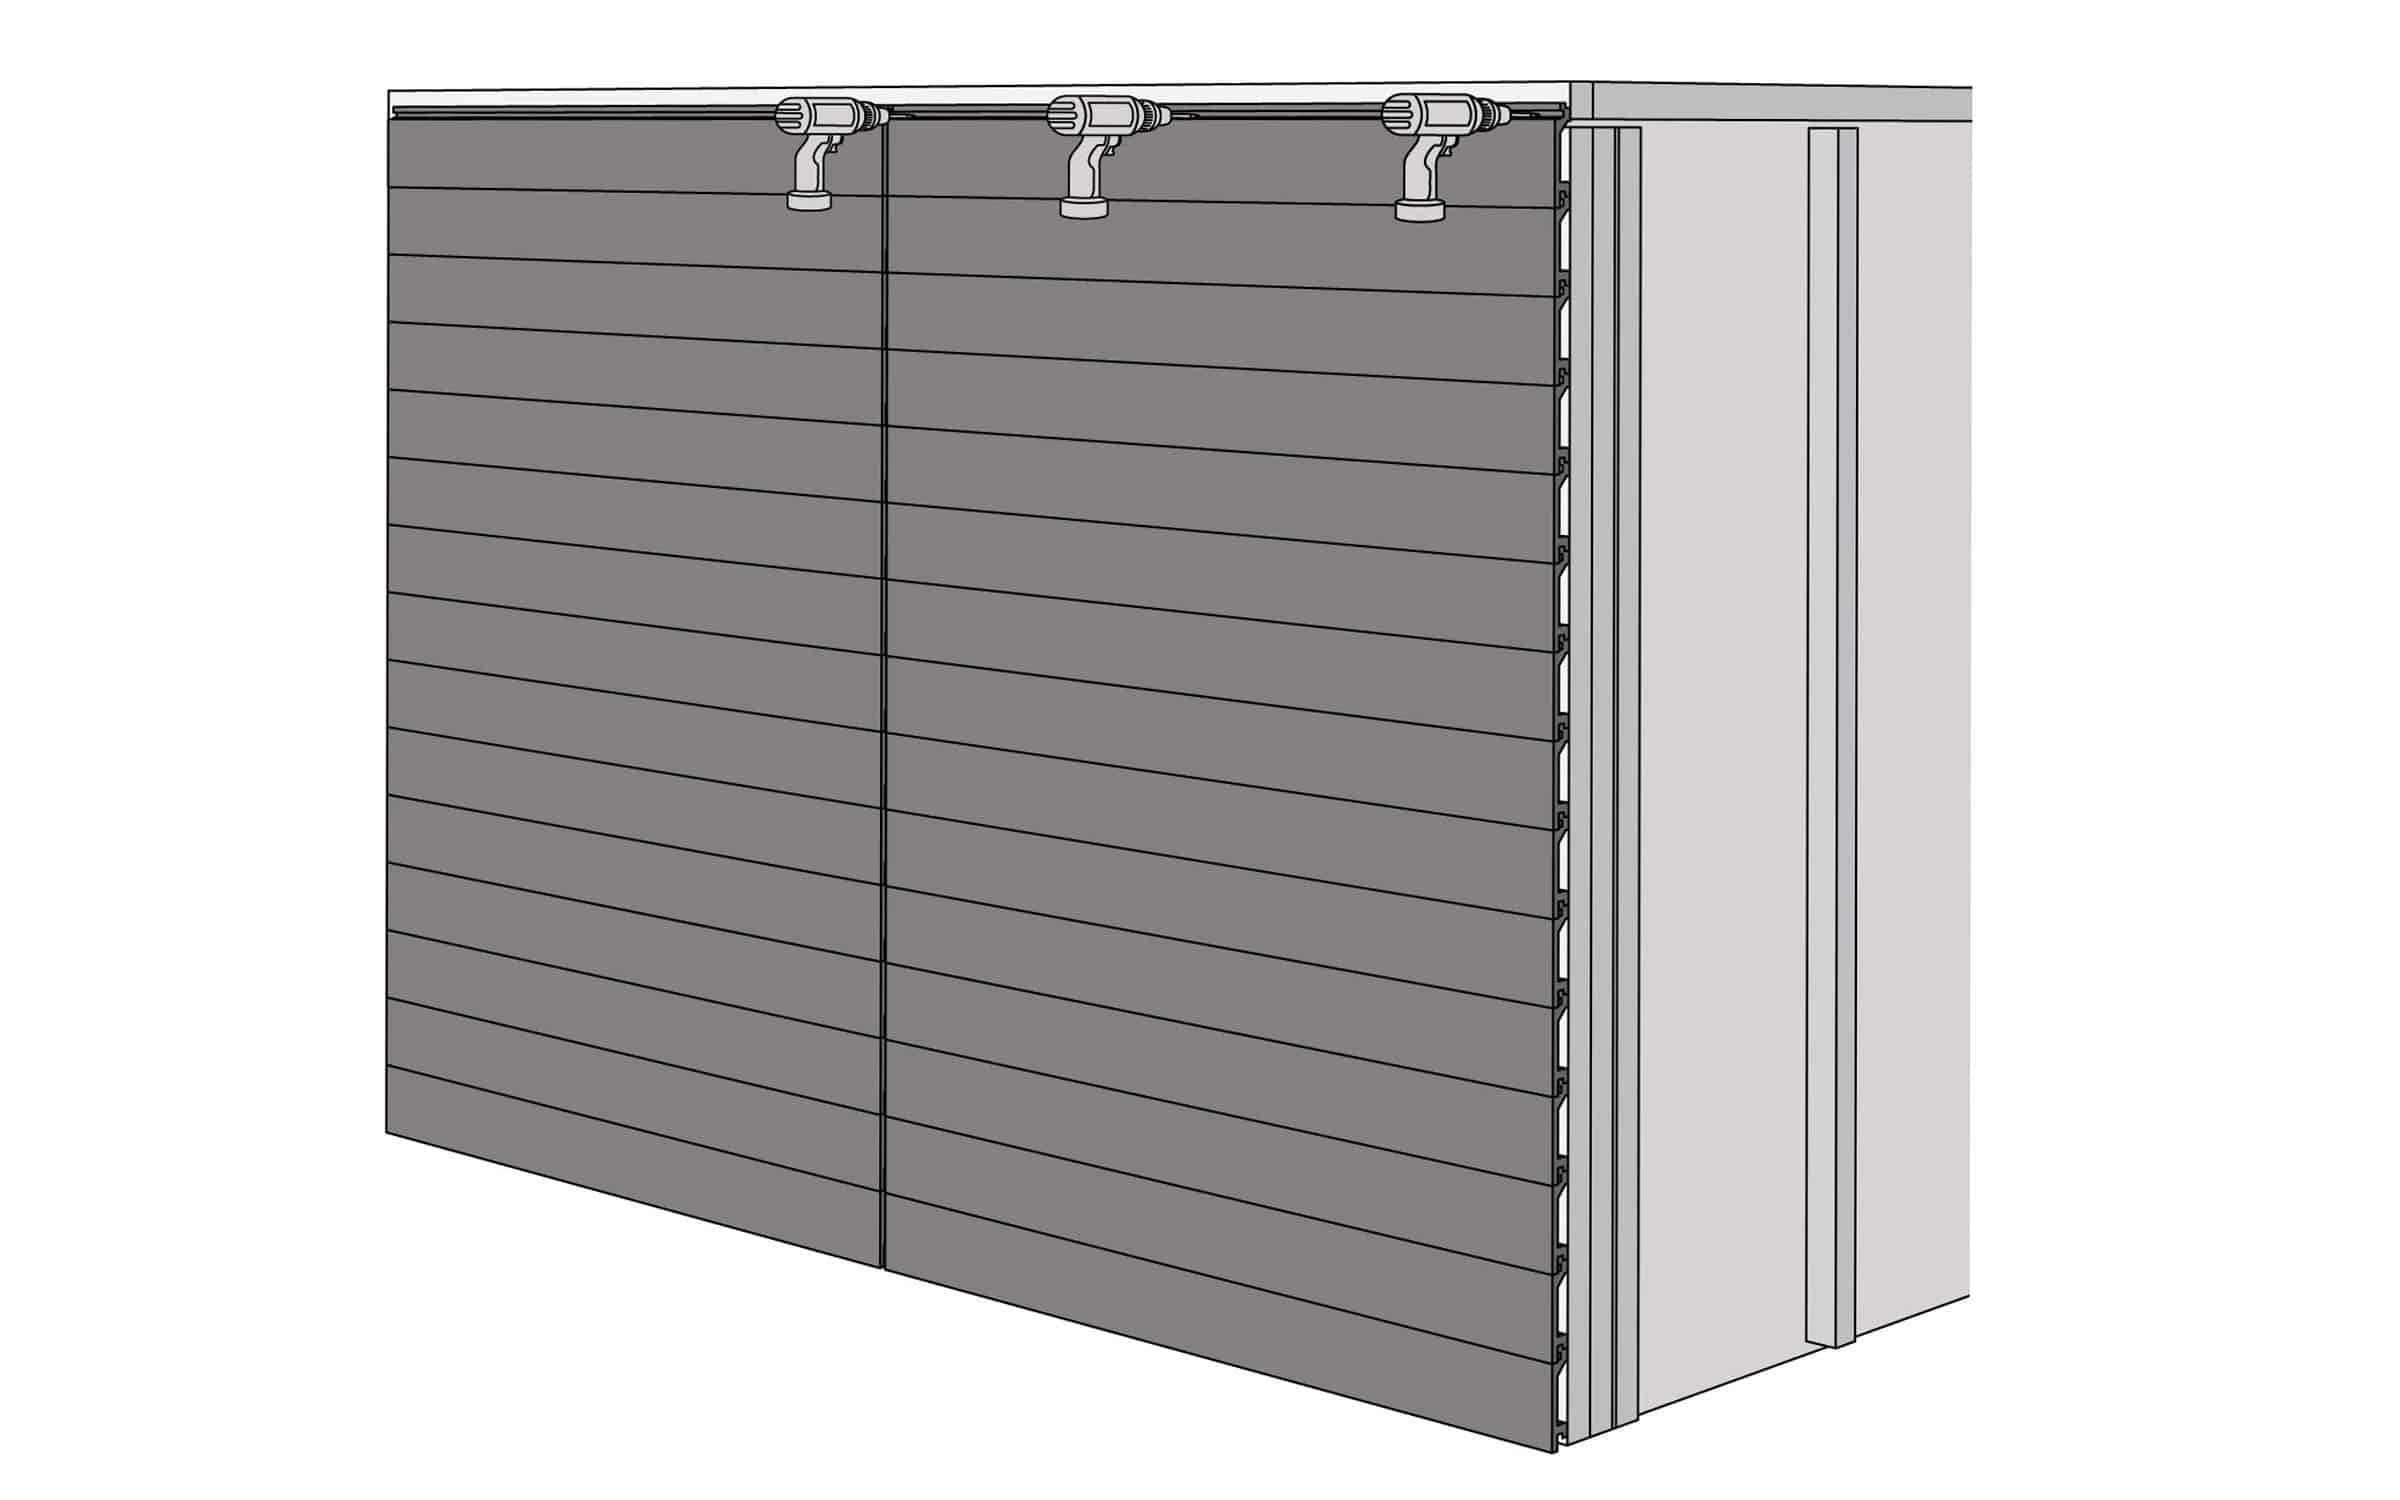
You are now ready to fix the top of the cladding board. Firstly, pre-drill a 3mm hole into the top channel of the first cladding board. Be sure to hold this in place as this will not yet be fully secured. Fix the top of the cladding board to the joist with a NeoTimber® Cladding Screw. Work along the length of the cladding board to ensure that the board is fixed to every supporting joist.

Step 3. Install All Subsequent Cladding Boards Using Stainless Steel Cladding Screws
Once your first row of cladding board(s) are in place and secure, install all subsequent cladding boards using NeoTimber’s Cladding Screws. Slot the concealed groove of the second board into the top groove of your first cladding board. Once the base of the second cladding board is secure, fix the top grooved-channel by pre-drilling the material and securing with a cladding screw to your joist – as outlined in step 2. Repeat this process for all subsequent cladding boards.
When fixing two adjoining cladding boards, it is important to allow for adequate expansion gaps to allow for the material to expand and contract freely. The gap observed is dependent on the outside temperature and the time of installation. Refer to the temperature chart on our pre-installation guide for more information.
Step 4. Installing Cladding Boards Around Fixtures
Depending on the design of the installation and the position of fixtures such as doors and windowsills, there may be a requirement to cut cladding boards along their length to suit the shape and design of the fixture. Firstly, cut the cladding board to the correct size and shape. Fix this cladding board in the conventional way where possible (slotting the concealed groove into the cladding board below and fixing the top groove onto your joist with a cladding screw). In areas where this is not possible, use a NeoTimber® Colour-Matched Trim Screw to face fix the unsupported section of the board to a supporting joist. Each cladding board should be fixed at both the top and bottom.
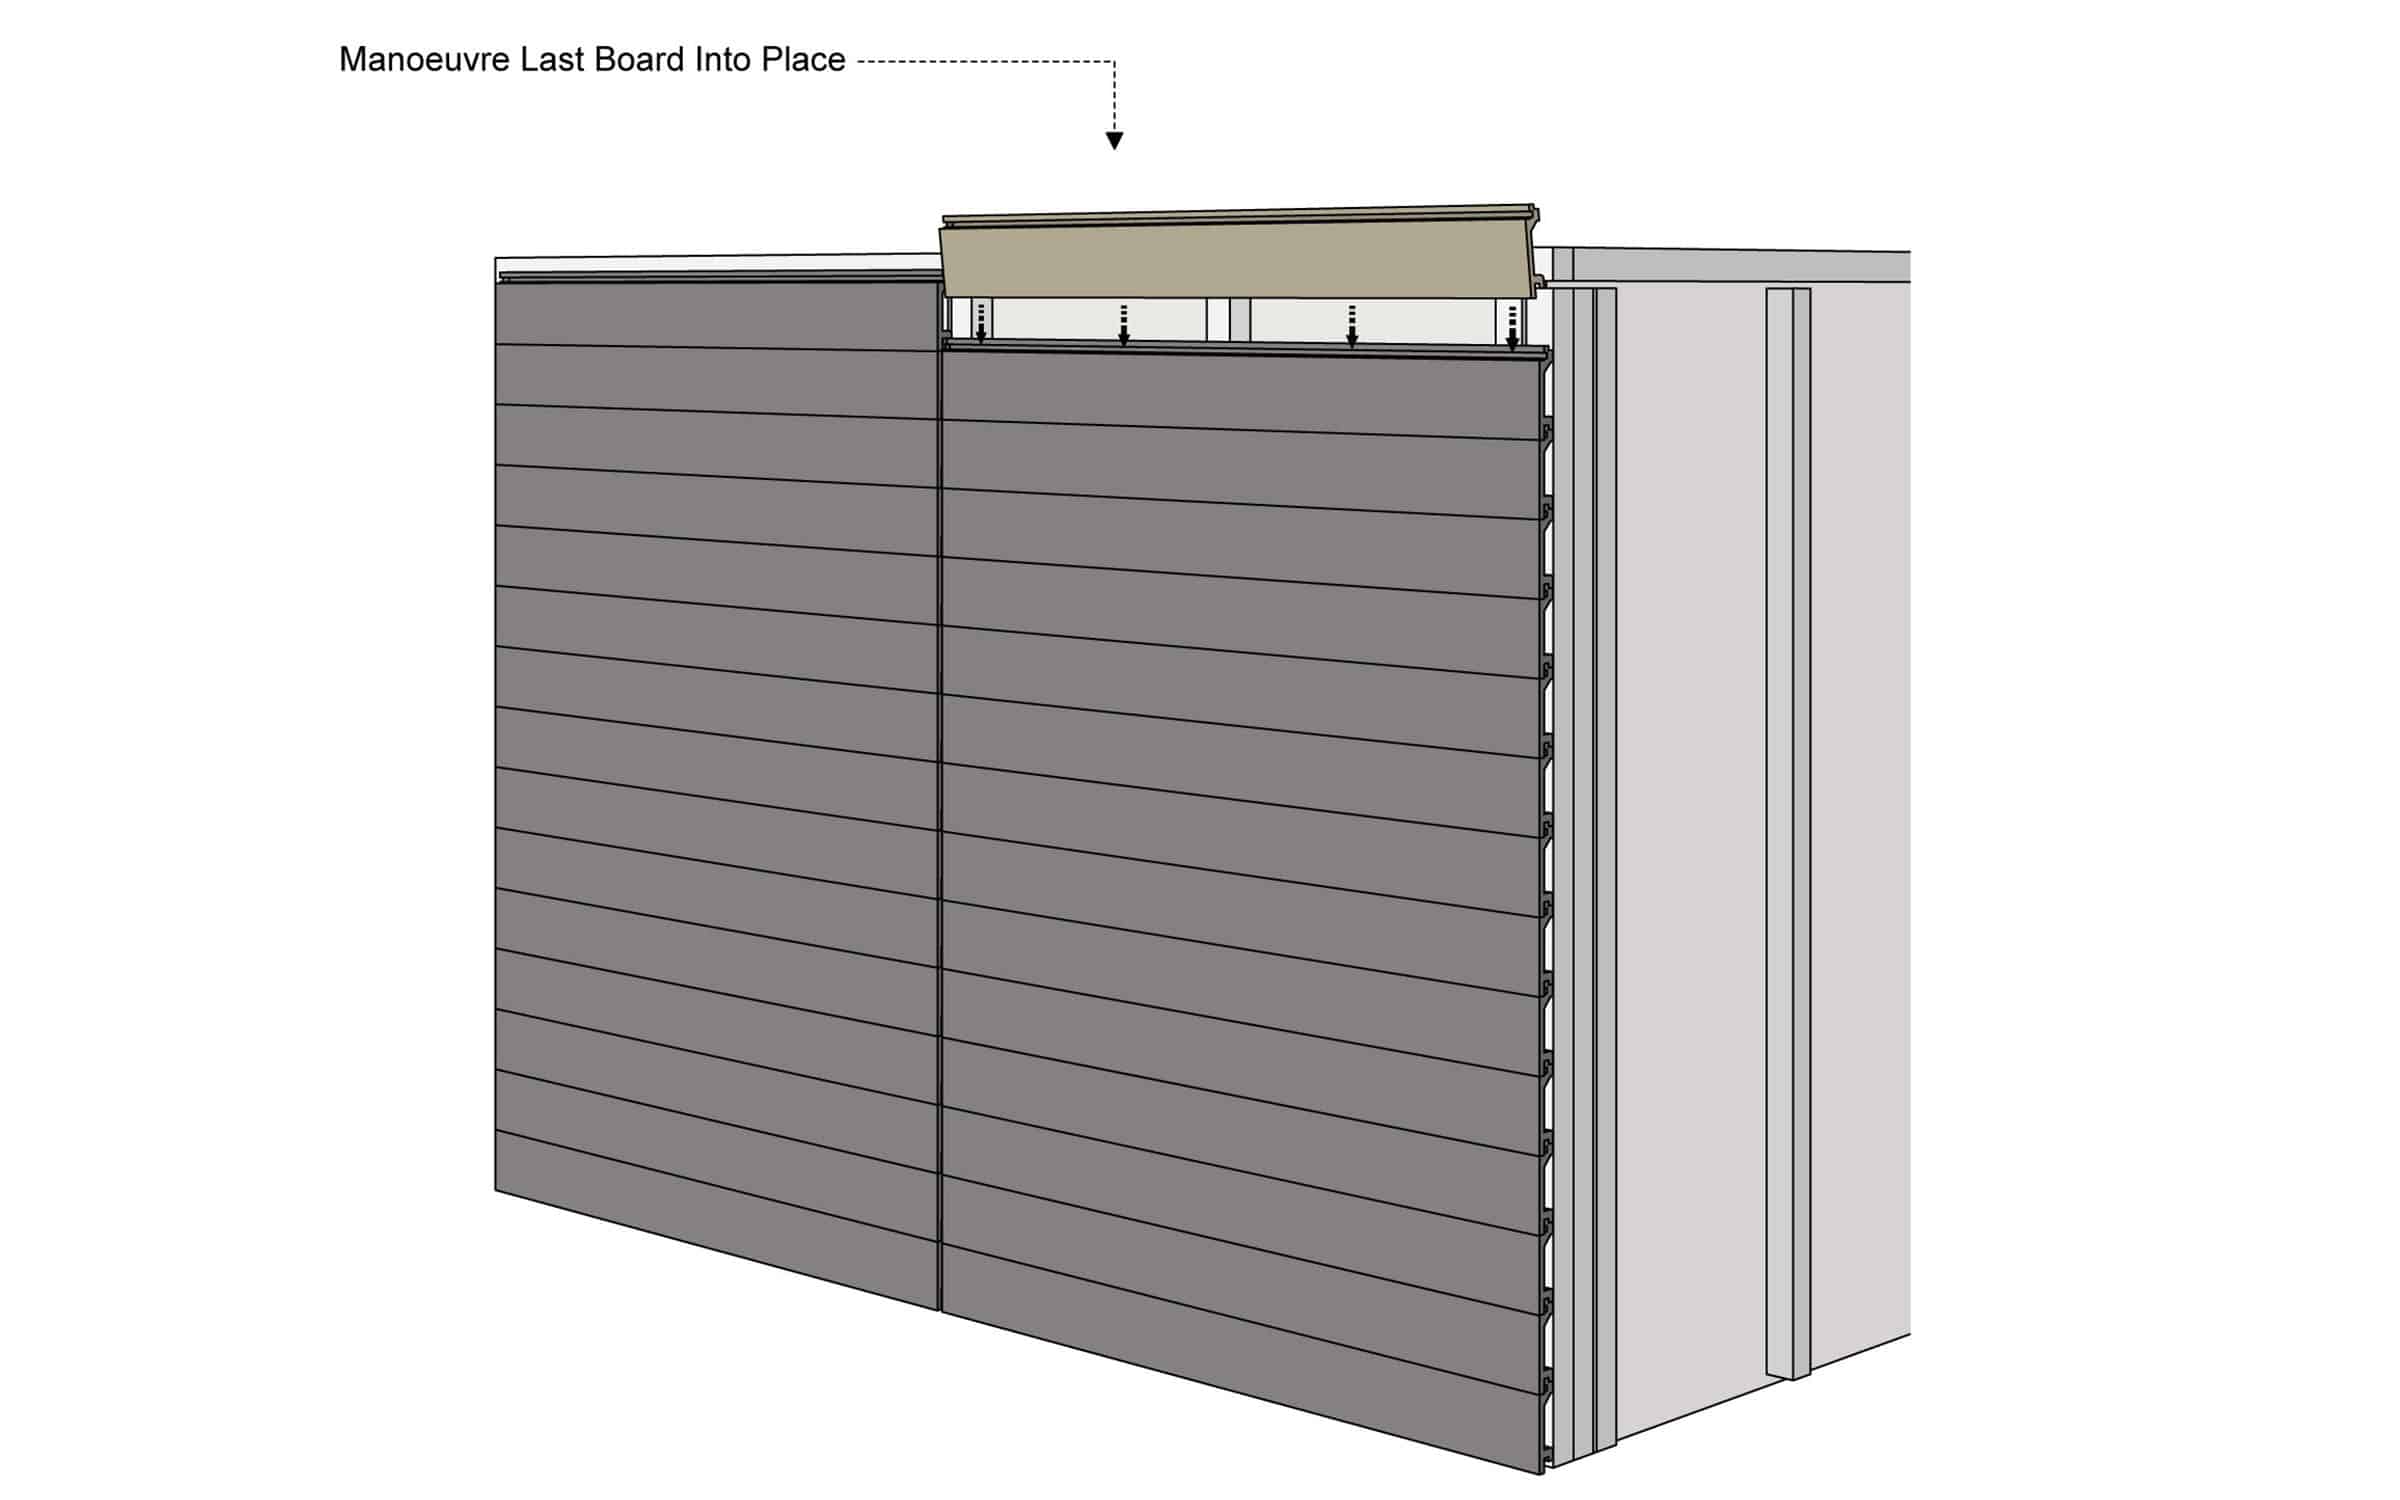
Step 5. Installing The Final Cladding Board
Install your final cladding board by fixing its concealed groove to the top groove of your penultimate board. If there is no need to cut your final cladding board, simply fix the top groove of the cladding board as you would any other. If there is need to cut the final cladding board down its length, face fix the material using a NeoTimber® Colour Coded Screw – fixing into the face of the product.
Vertical Installation Of Cladding Boards
Step 1. Align & Securely Fix Your Starter Clips To The First Run Of Joists
Starting at the edge of your project, begin attaching NeoTimber® Starter Clips to the edge of your framework using the stainless screws provided. It is important that you mark a level line to ensure a straight and level line of Starter Clips are evenly fixed to your row of battens. Position and securely fix a Starter Clip at the furthest edge of each joist to ensure your first cladding board is securely fixed into place.
Follow the steps outlined in 2-5 of the “horizontal installation” guide above.
Fixing Composite Cladding Trims
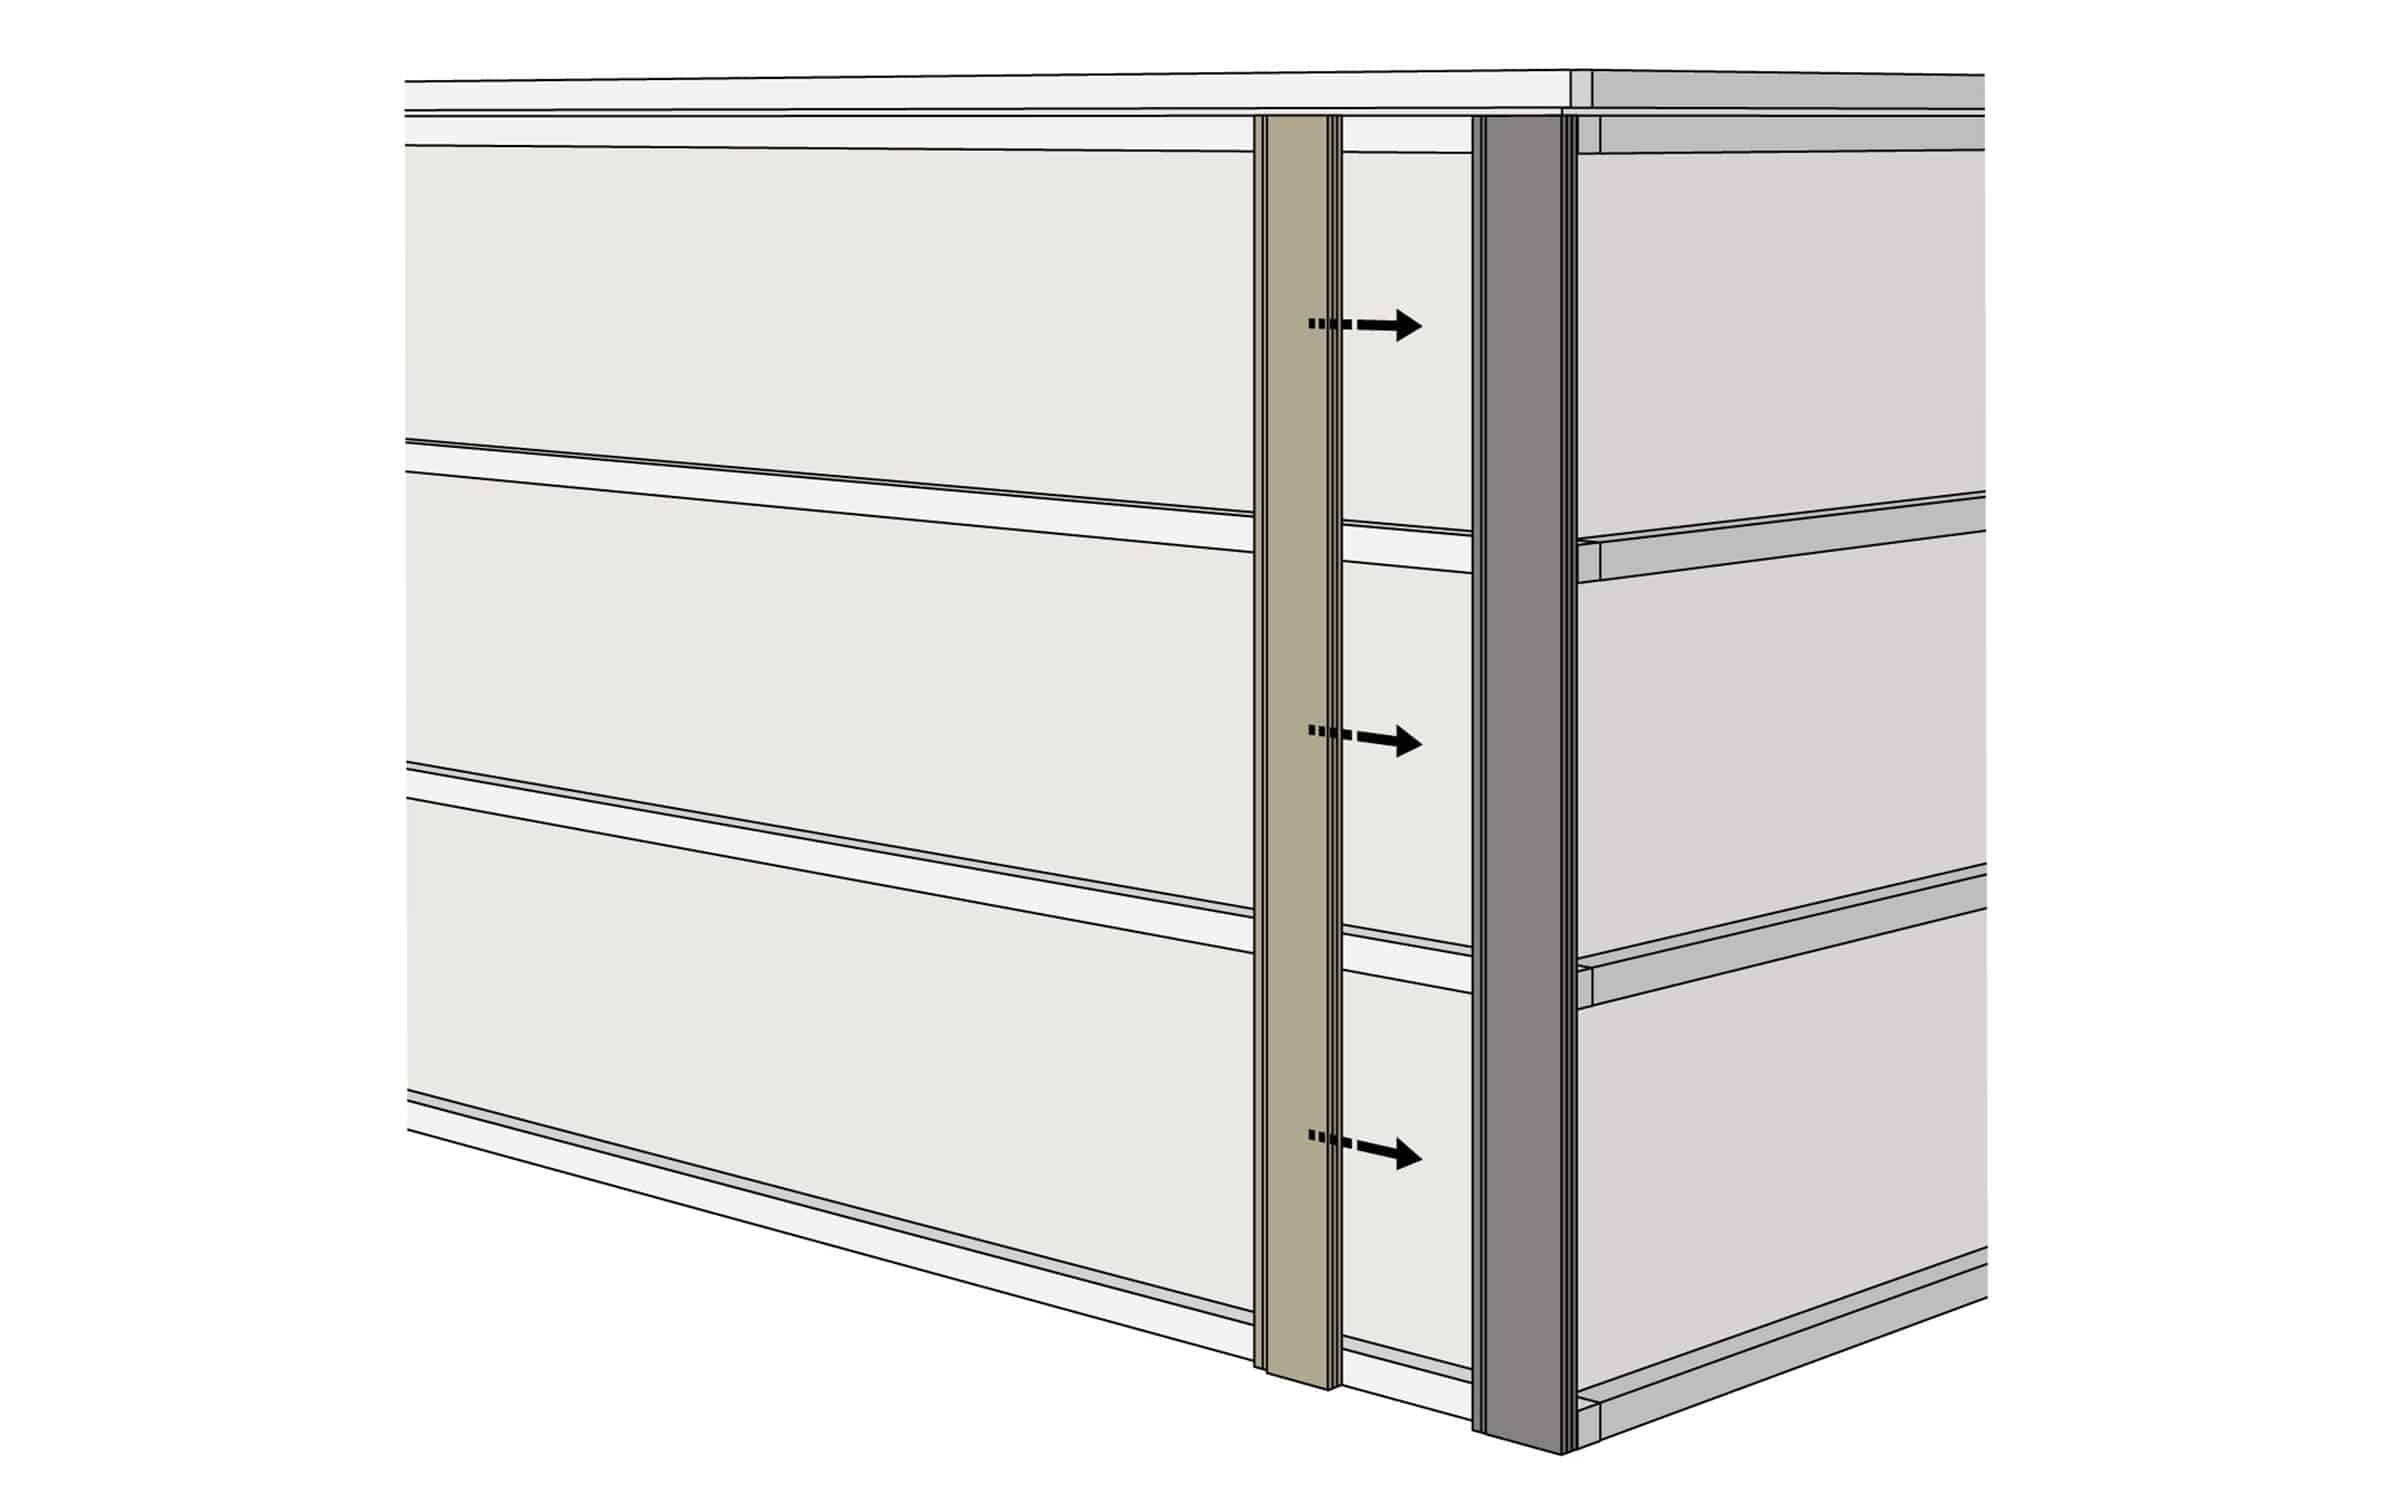
Installing composite cladding trims is the ideal solution for capping-off exposed edges and expansion gaps. A good edging solution can provide the finishing touches to your cladding installation. NeoTimber® provide two solutions: a Skirting Trim and a Corner Trim. Designed to cap off exposed edges of a cladded area, cover expansion gaps and covering the returns on doors and windows, these solutions are diverse in their application. We outline the fixing methods involved with both our Skirting Trim and Corner Trim. It is advised both are fixed securely with NeoTimber’s Colour-Coded Trim Screws.
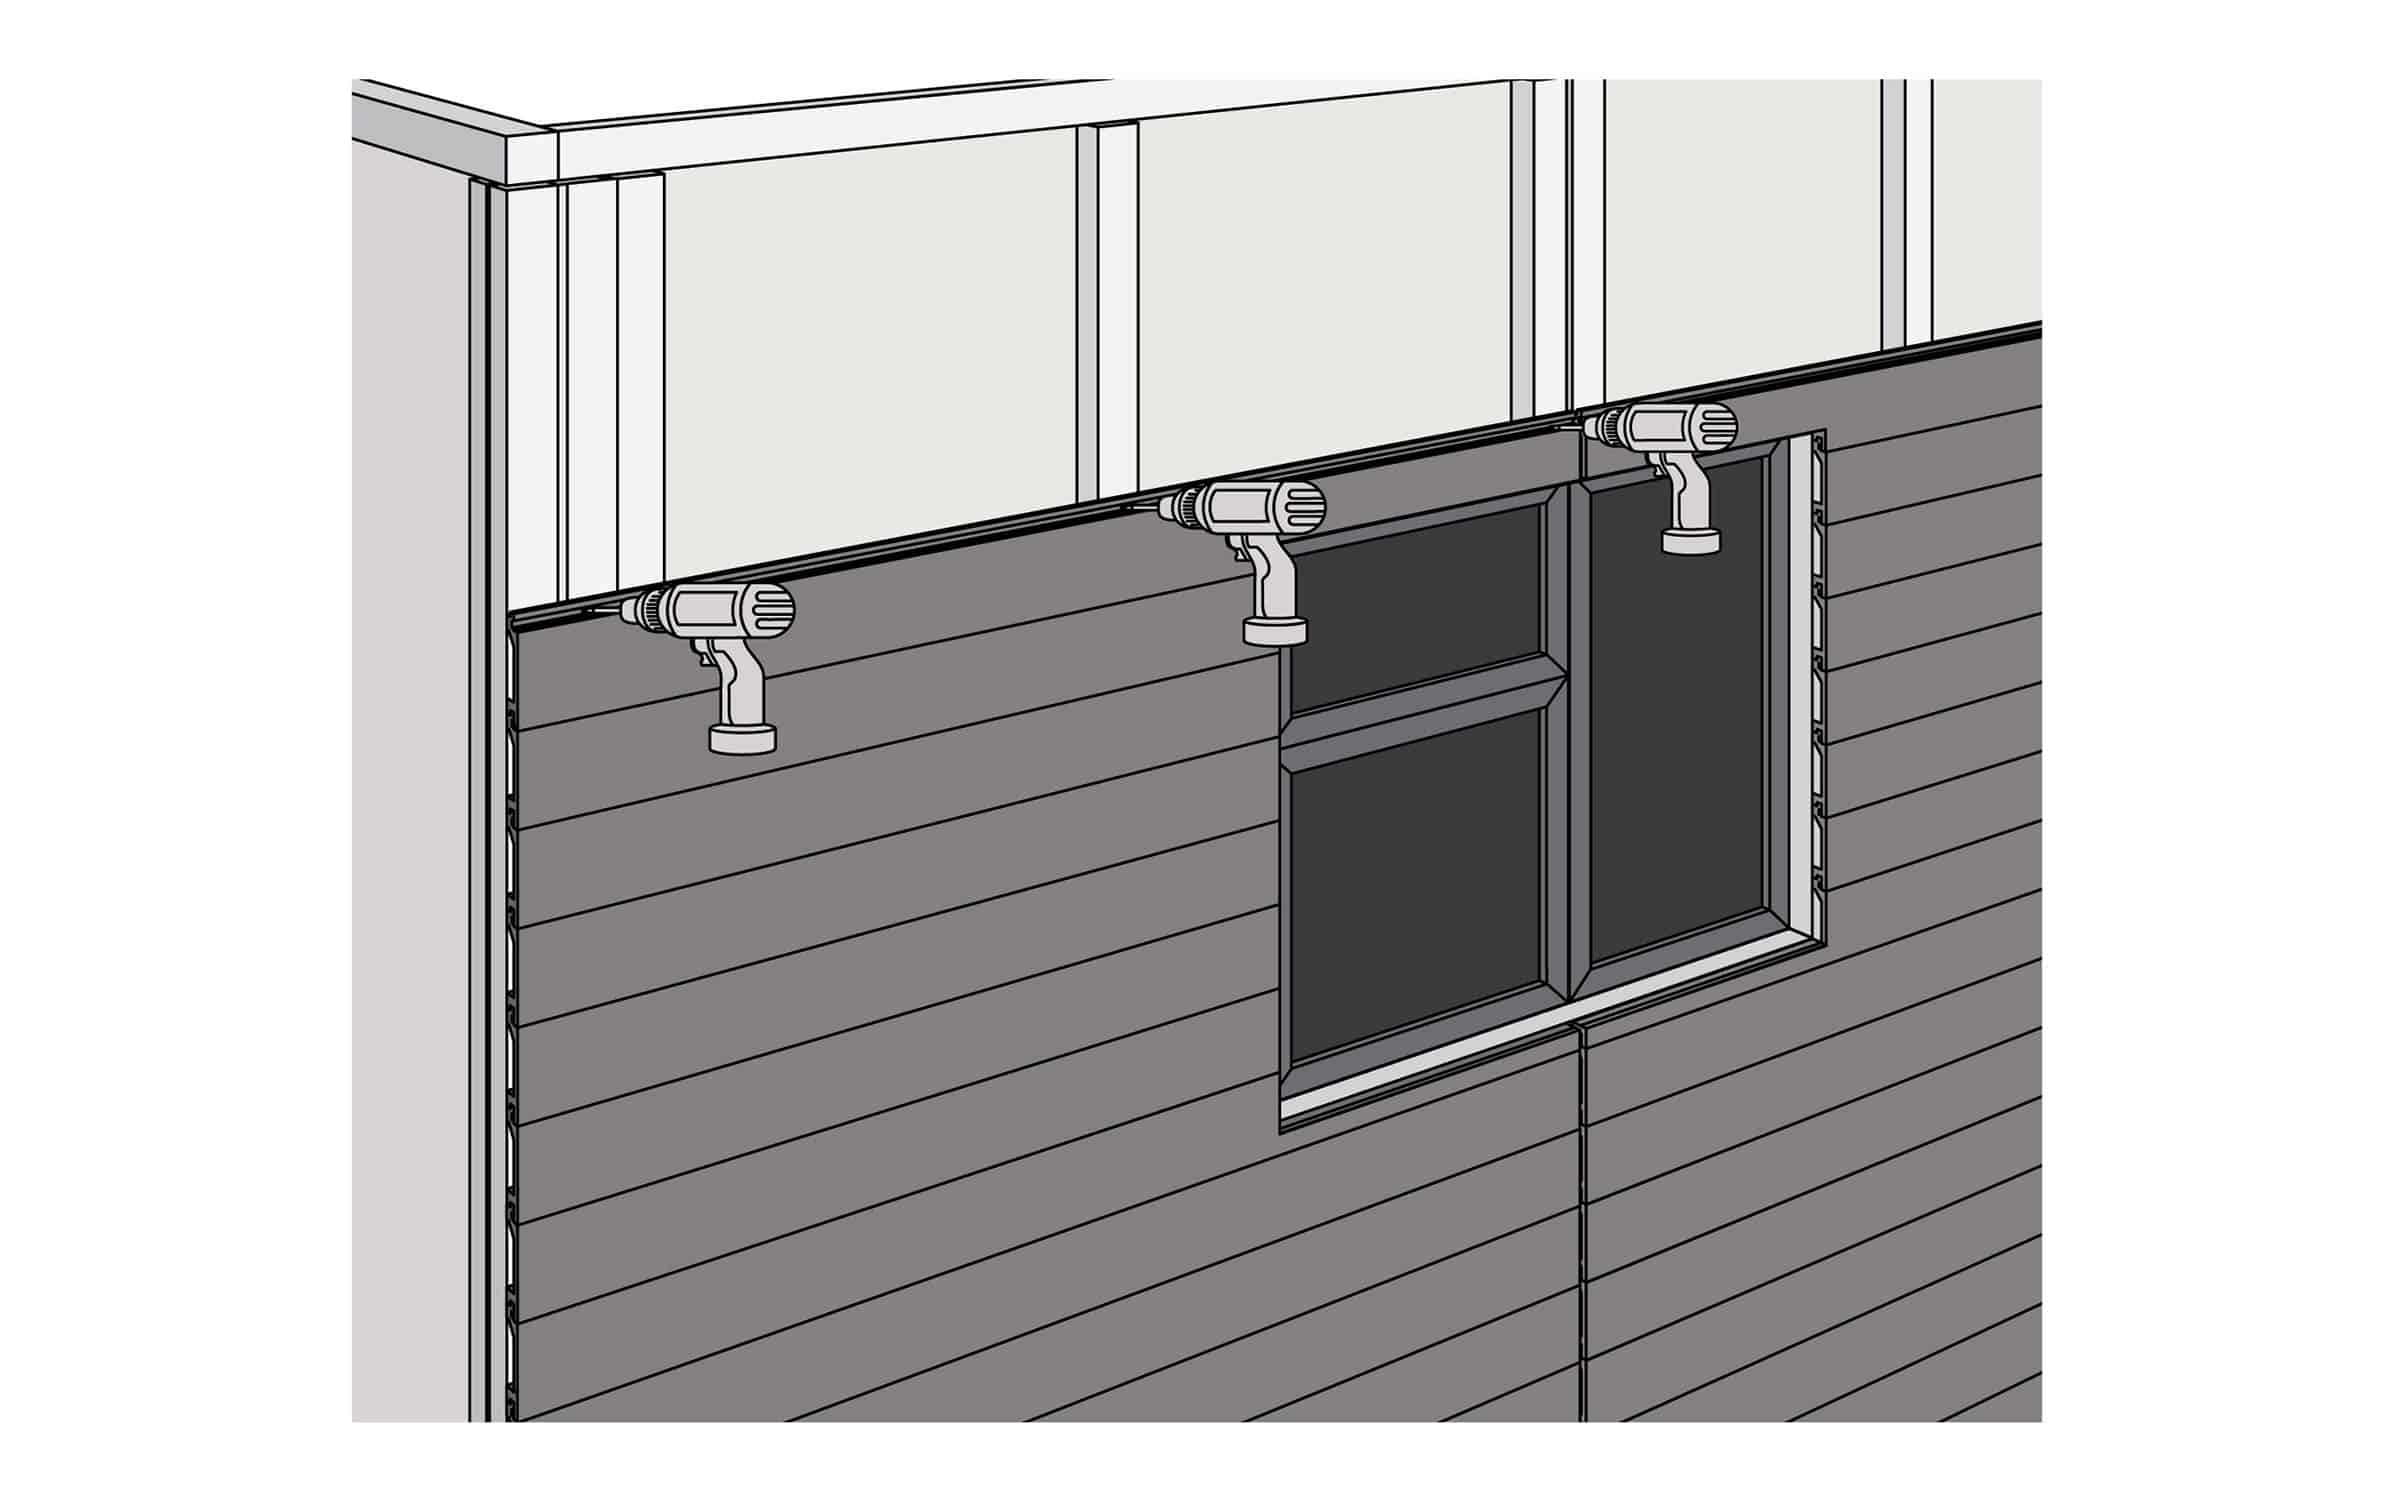
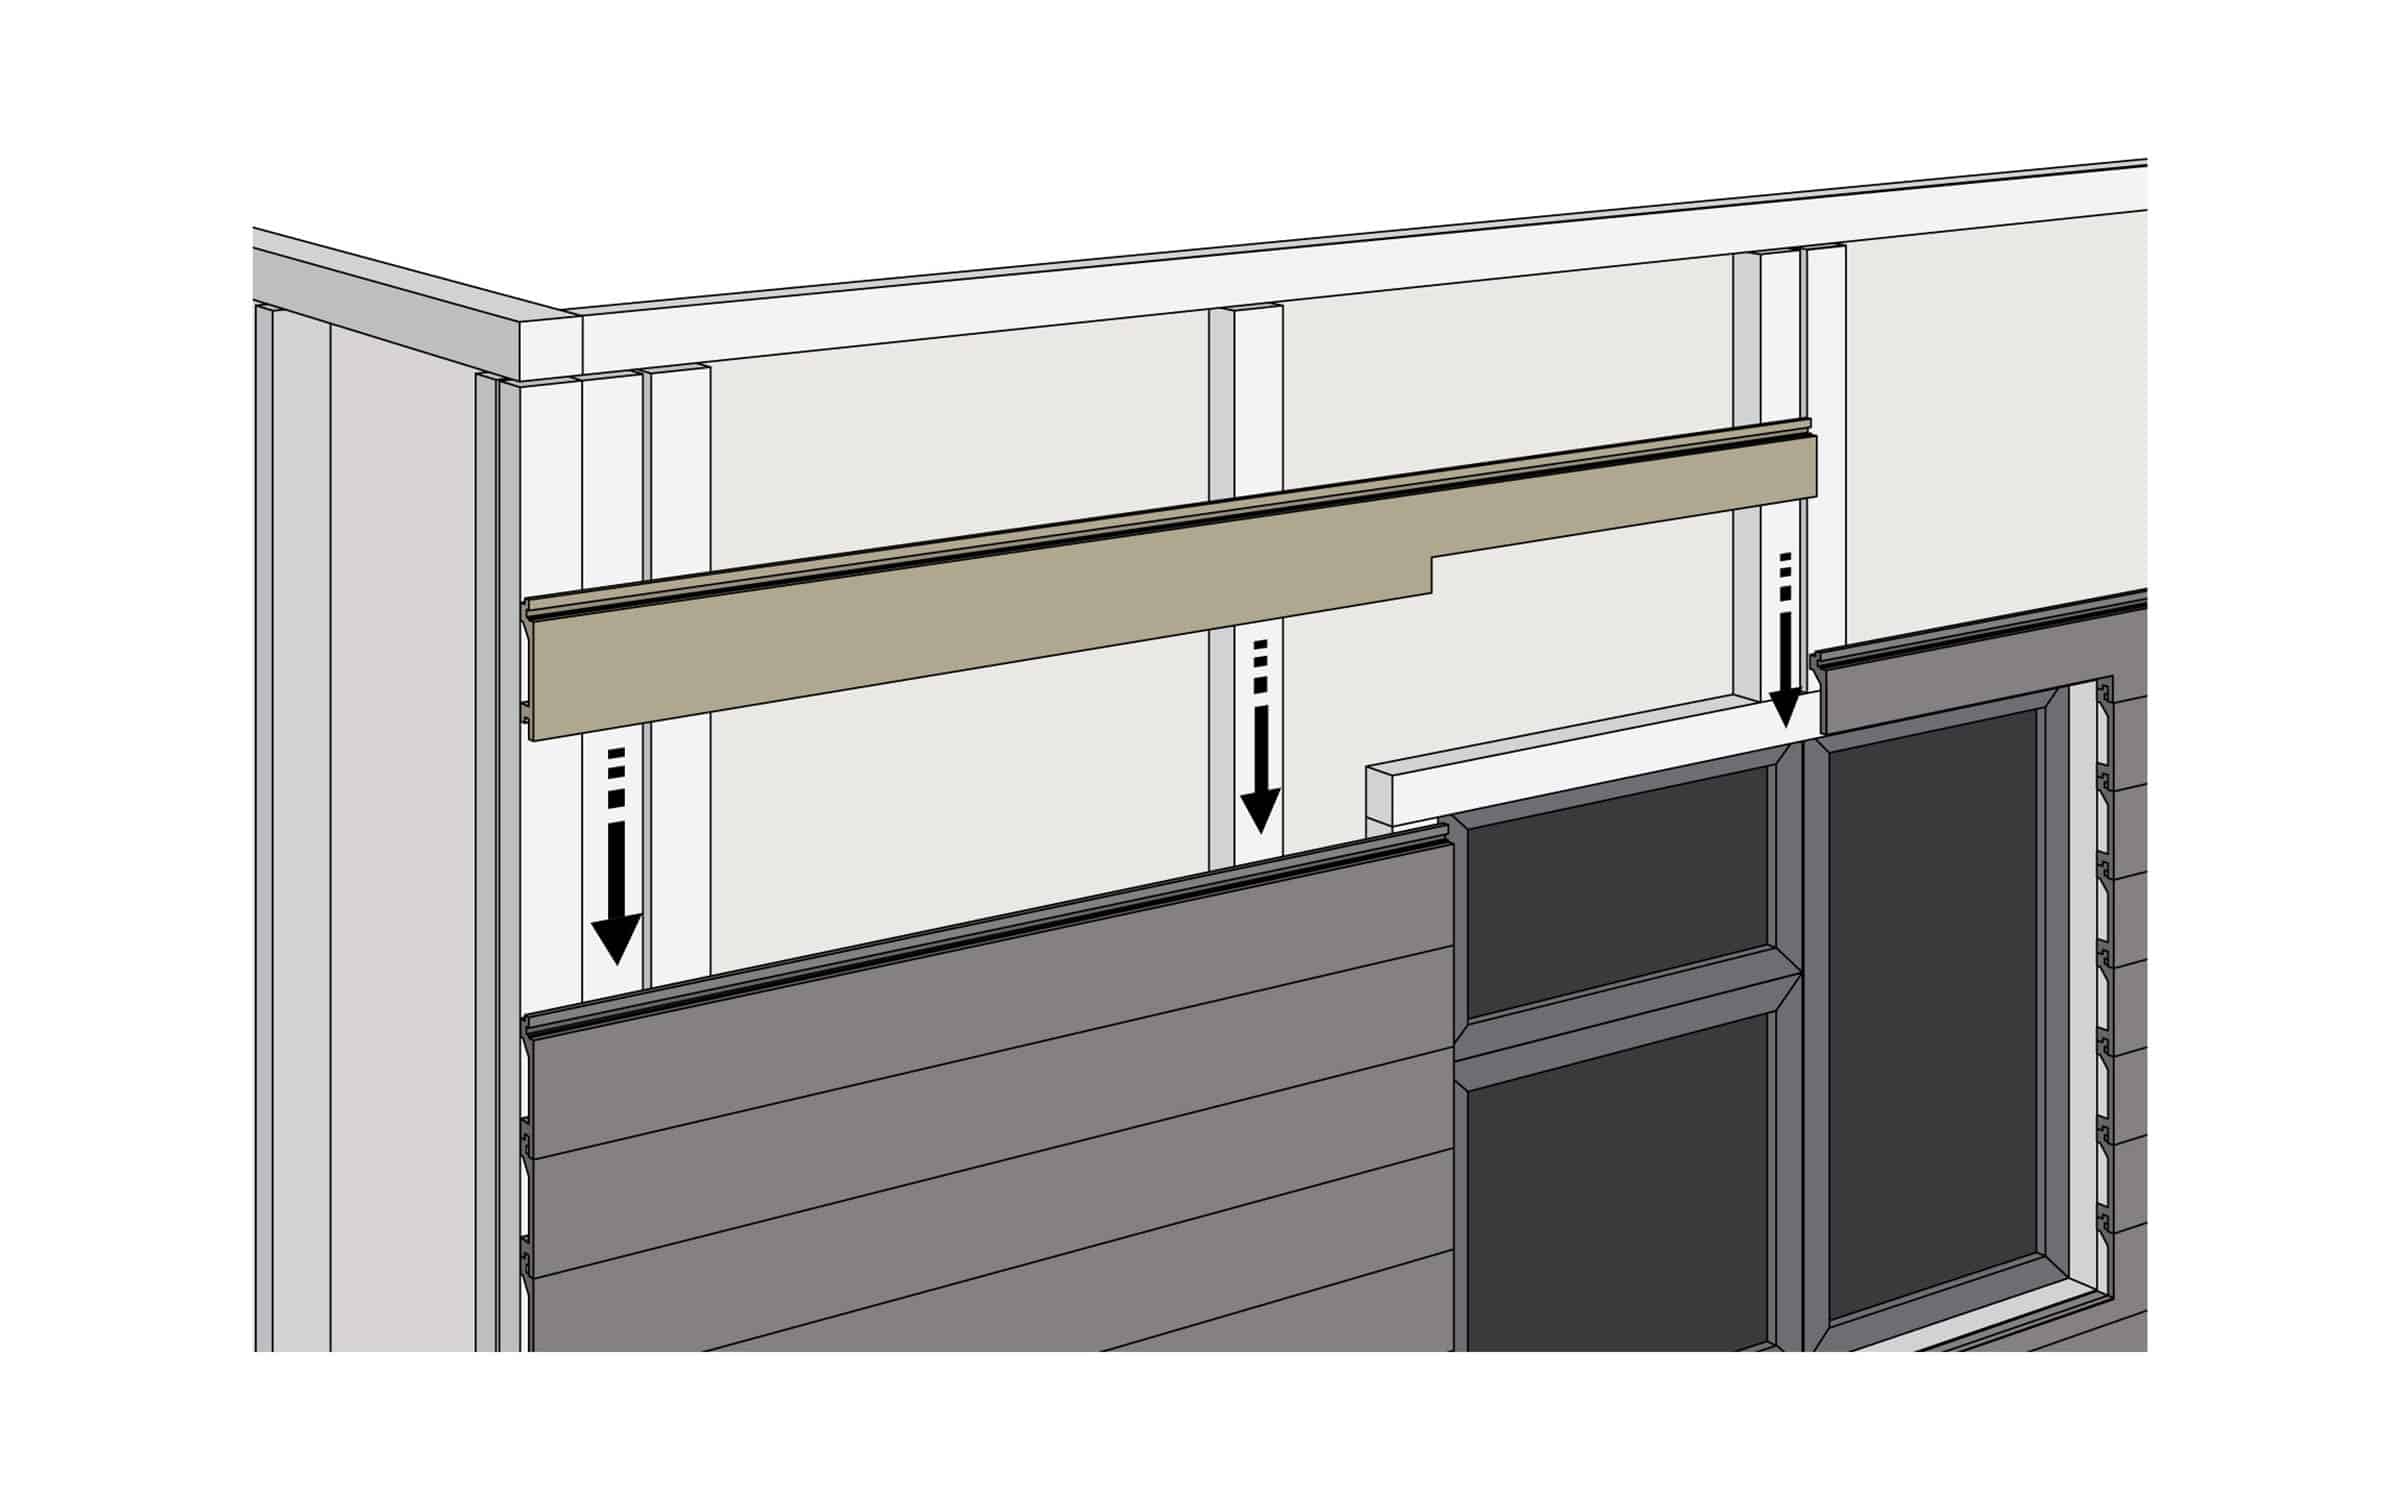
Installing Our Edging Trims Around Windows & Doors
When cladding the internal sections of a window or door, NeoTimber’s range of edging options can be used. We provide installation guidance on two separate ways you can install these options.
Corner Trim Window & Door Installation
Cut the trim down to size and ensure each length is mitred at a 45-degree angle where trims are expected to meet at corners. Fix onto the exposed corners of the windowsill, ensuring the exposed edge of the cladding boards are suitably concealed. Pre-drill the material and fix at 300mm intervals using NeoTimber’s Colour-Coded Trim Screws.

Skirting Trim Window & Door Installation
Cut the trim down to size and fix on the internal section of the windowsill, ensuring the exposed edge of the cladding boards are suitably concealed. Pre-drill the material and fix securely at 300mm intervals using NeoTimber’s Colour-Coded Trim Screws.

Installing Our Edging Options To Cover Exposed Edges & Expansion Gaps
It is unlikely that you will complete a project without having either exposed edges visible or expansion gaps which may require a fascia solution. NeoTimber’s Corner Trim and Skirting Trim can both be used as finishing solution. It is advised both are fixed securely with NeoTimber’s Colour-Coded Trim Screws.
Corner Trim Exposed Edge Installation
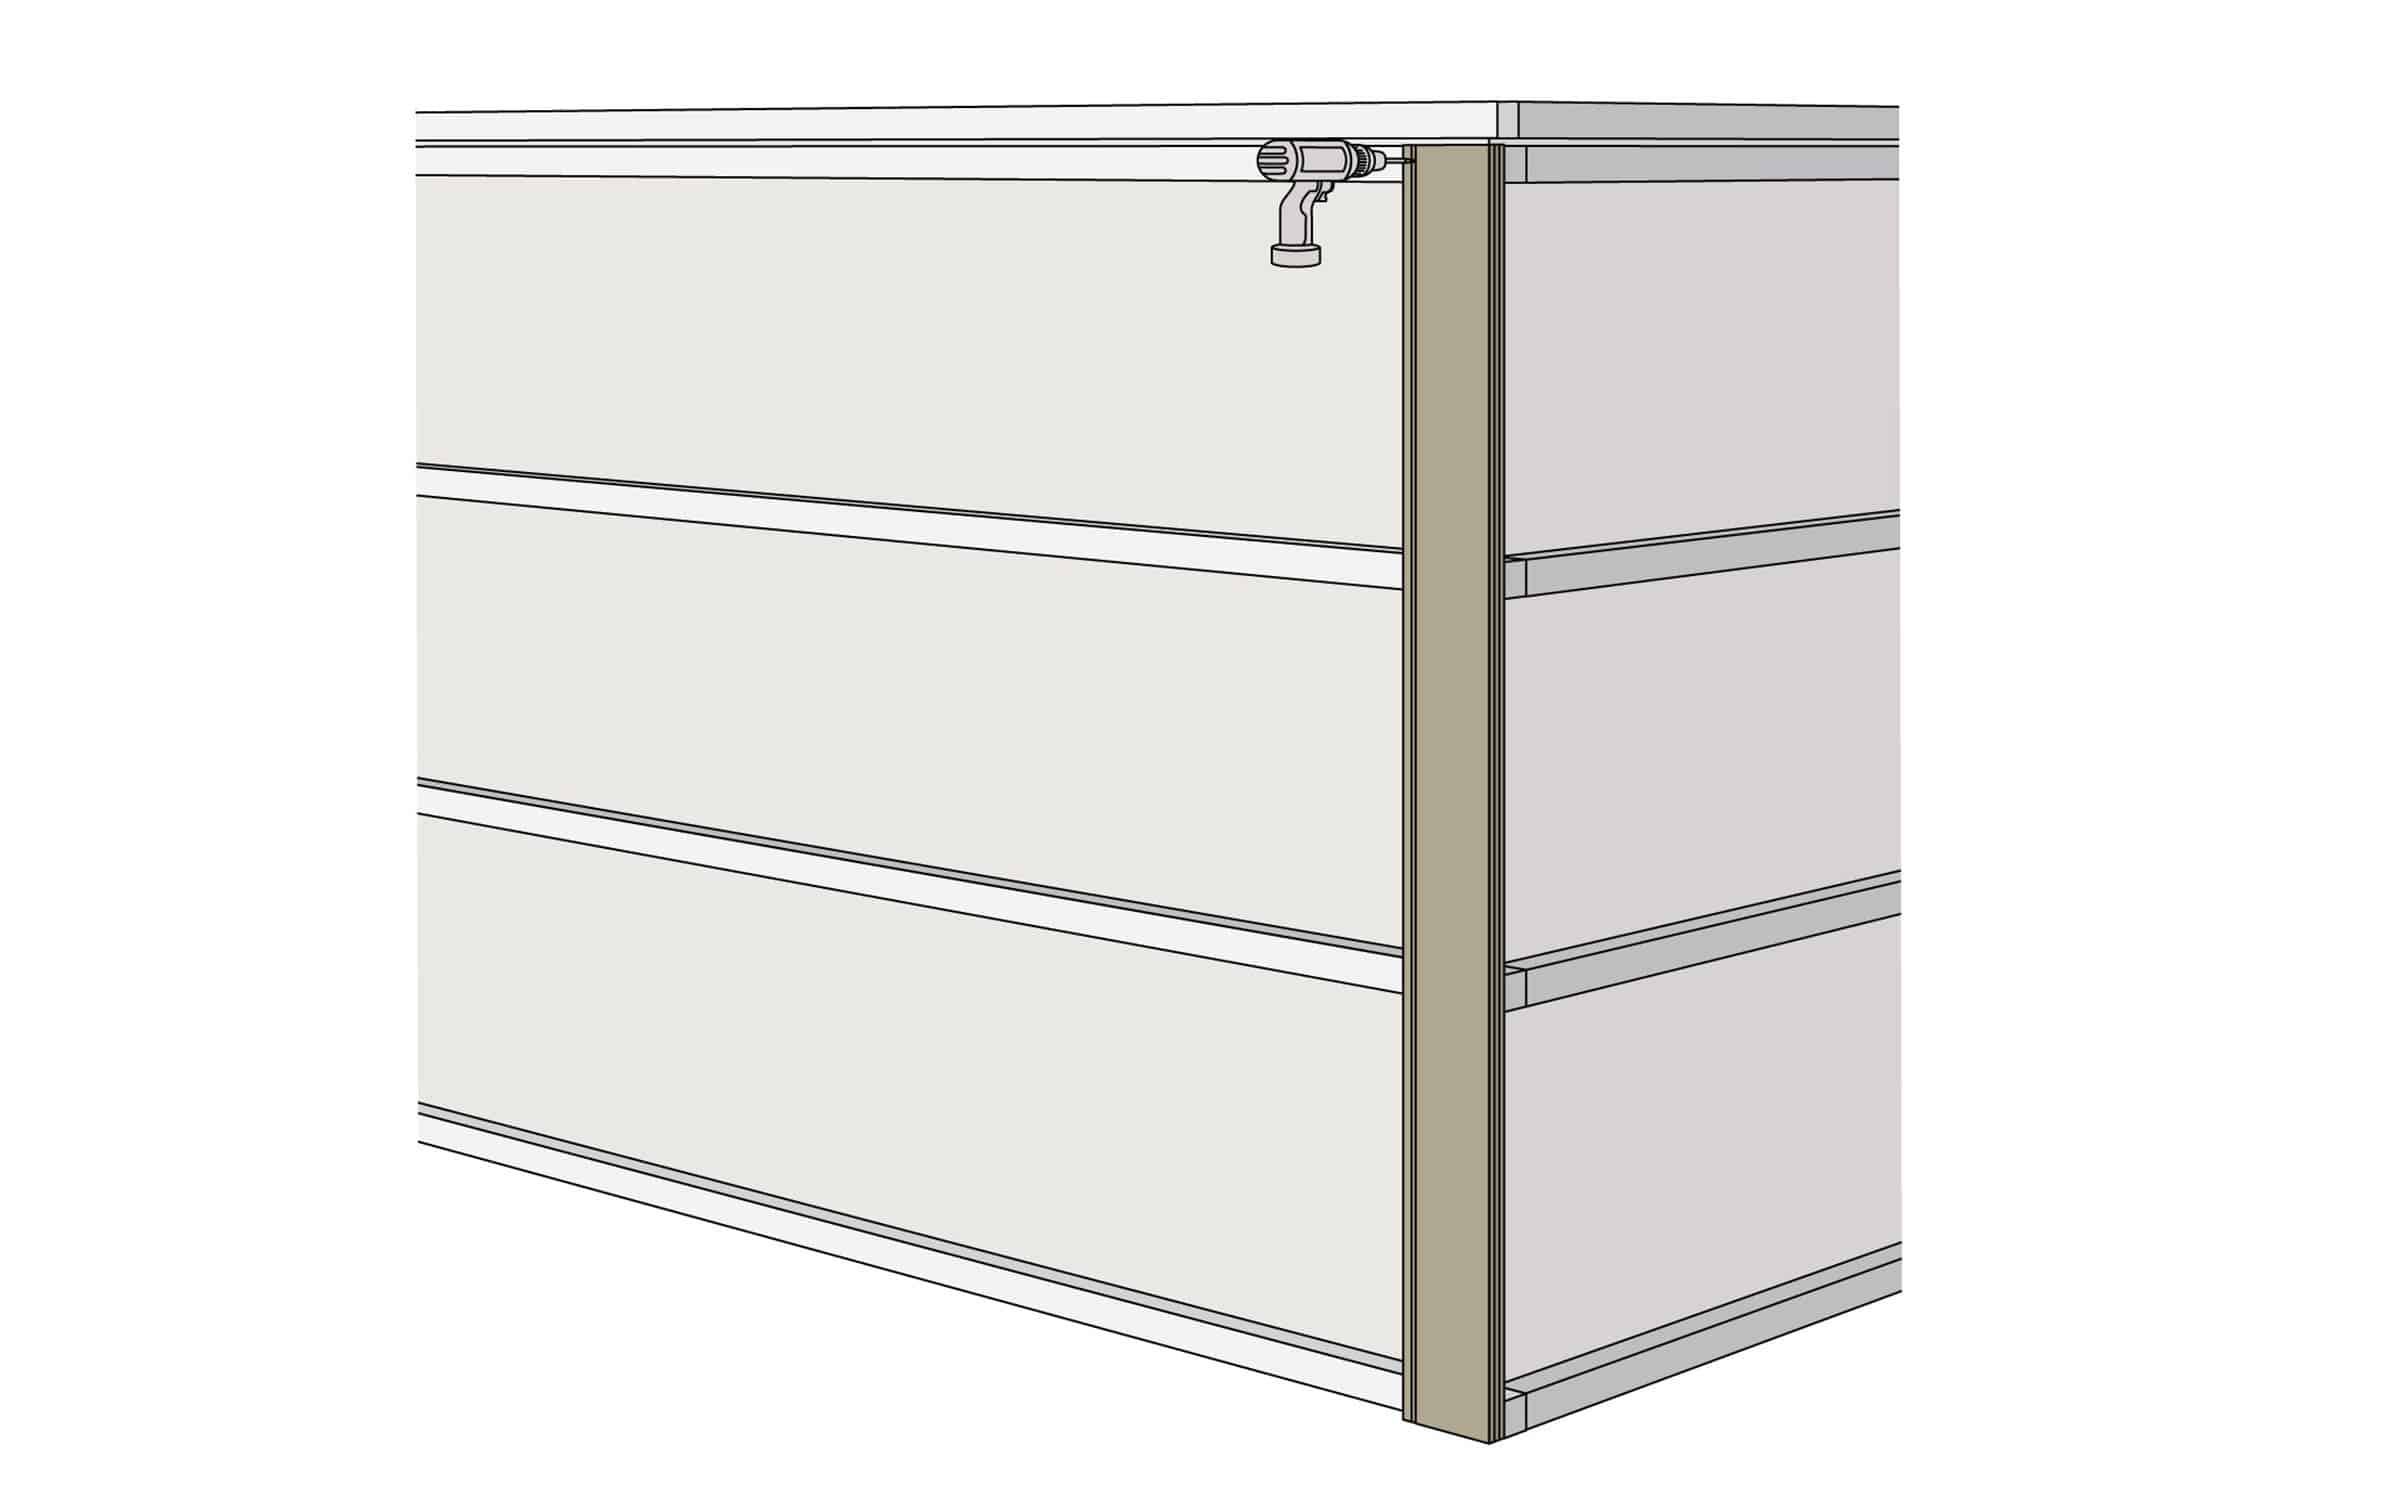
When faced with an exposed corner section whereby two rows of adjoining cladding boards are left exposed, NeoTimber’s Corner Trim can be fixed. Measure the area and cut the L-shaped Corner Trim to size; pre-drill the material and then fix securely using NeoTimber’s Coloured Trim Screw. Fix at every 300mm along its length.

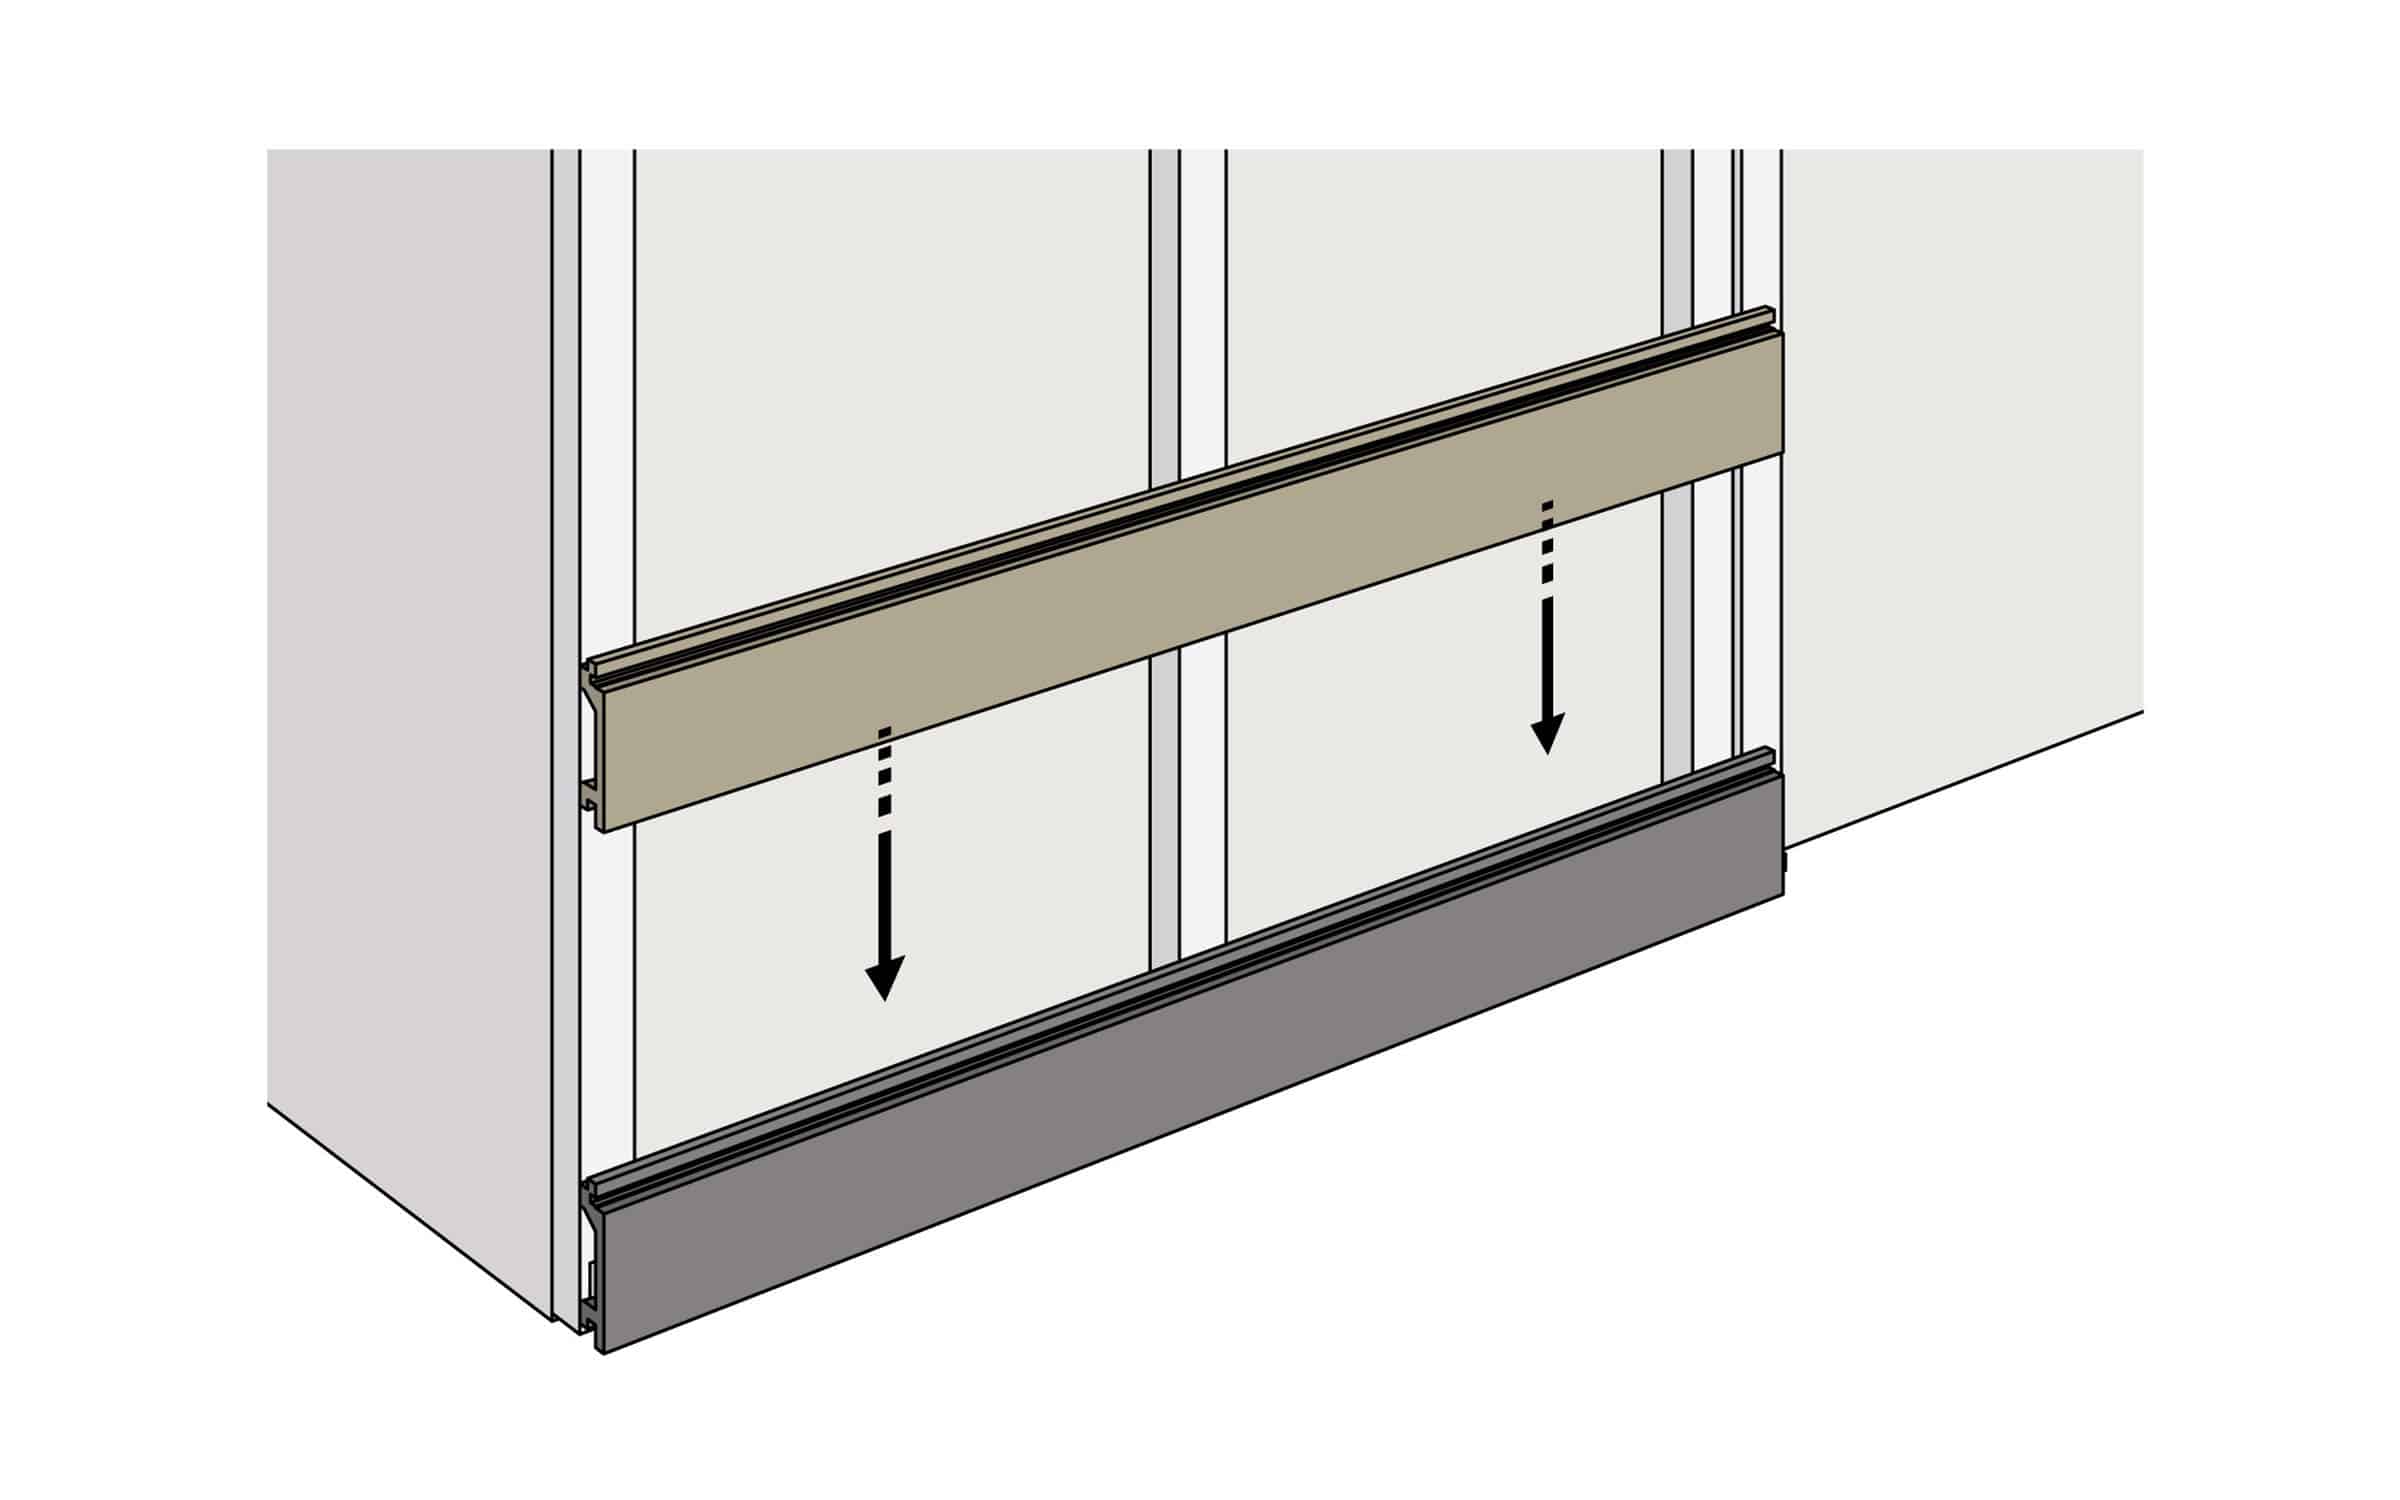
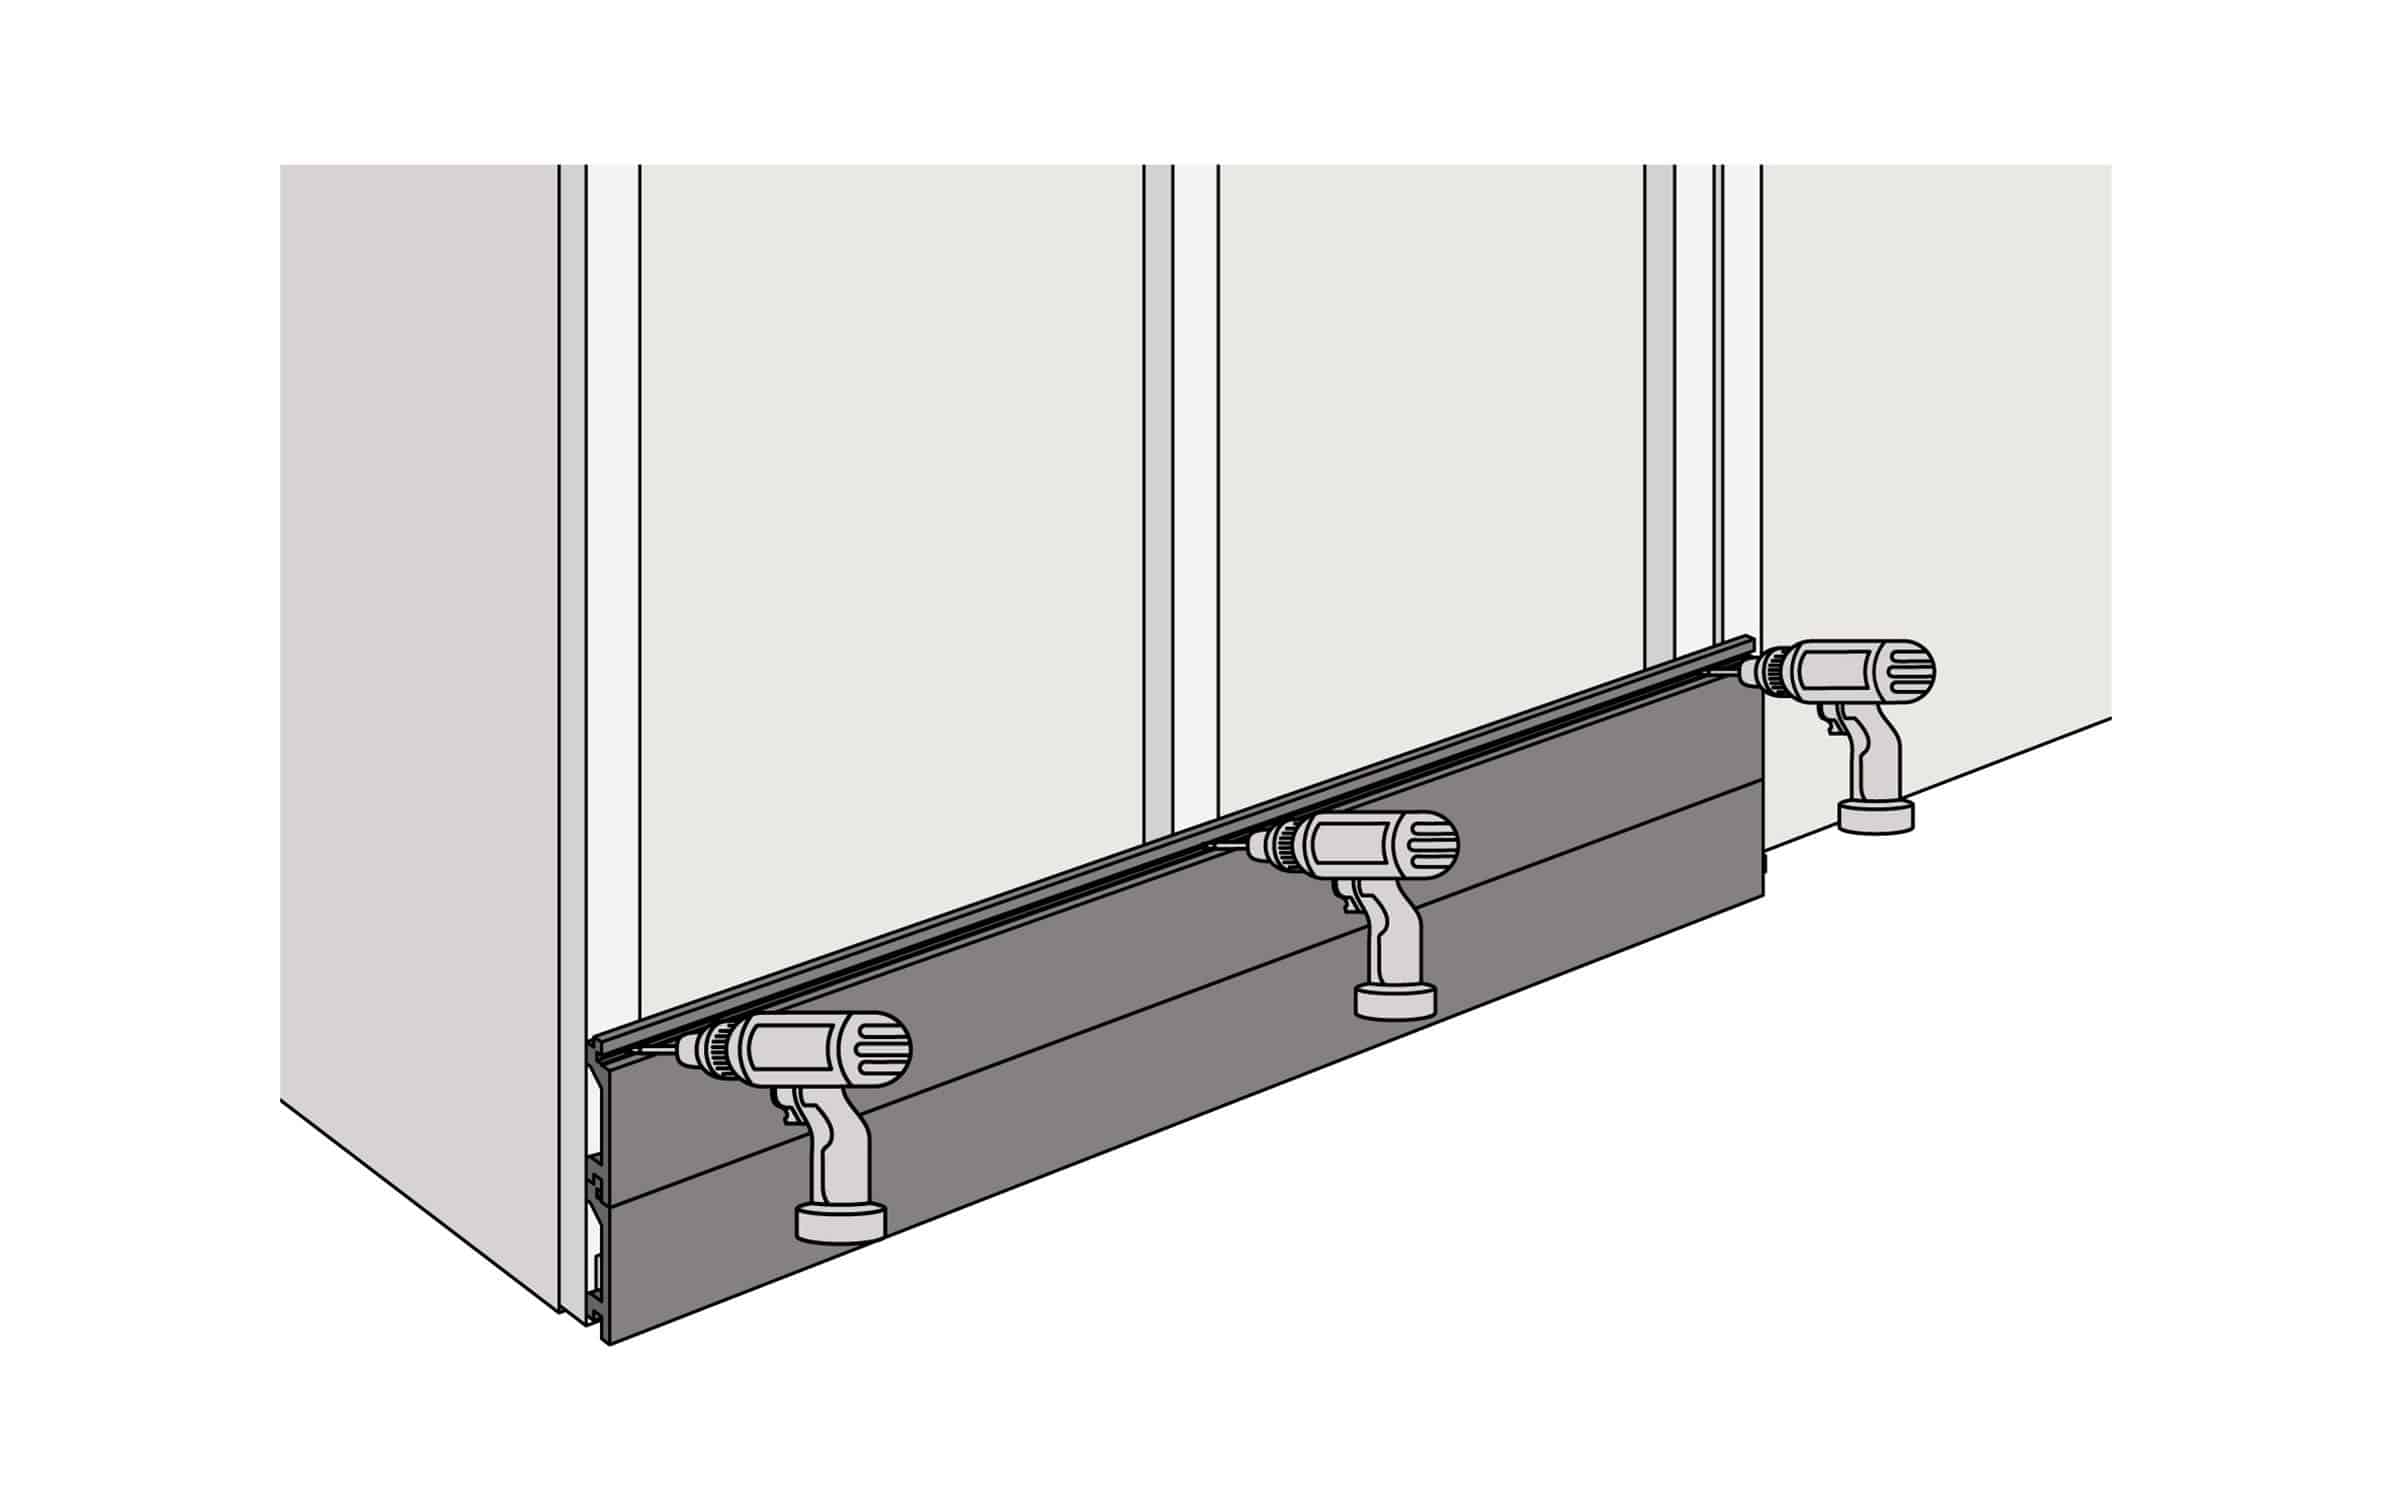
Skirting Trim Exposed Edge Installation
Upon installing your final board, there will be a requirement to cap-off the exposed edge of your final cladding boards. NeoTimber® Skirting Trims can be face fixed over our cladding products to conceal cut-ends and to cap-off the exposed edge of your final cladding board(s). Use a Coloured Trim Screw and fix at 300mm intervals along the length of the trim. It is advised that before doing so, an oversized pilot hole is drilled into the trim to ensure that it does not split or crack when screwed. We recommend using NeoTimber® Coloured Trim Screws for a discreet finish. When joining one trim to another, a minimum gap of 2mm should be left between trim ends, allowing for expansion and contraction.

Need Further Support or Advice?
If you’ve still got questions that have not been answered here, or you would like additional advice,
support or assistance then please give one of our friendly experts a call and we’ll be happy to help.
Just give us a call on 01530 382 180.