This section of our installation resources outlines NeoTimber’s guide to installing composite decking and edging. Once your subframe is securely positioned, installing our composite decking and edging options is made easy with the help of our clips and fixtures. A system that is designed to specifically work hand-in-hand with our boards – our hidden clips allow users to install composite decking without the hassle of face fixing along each deck board. Once securely installed, your decking can be topped off with a tidy finishing solution and our range of composite edging products to frame your project perfectly.
Below we divide up the two processes and offer a simple step-by-step guide to installing composite deck boards and edging products.
Installing Composite Deck Boards
1. Install The First Board Using NeoTimber’s Composite Decking Starter Clips
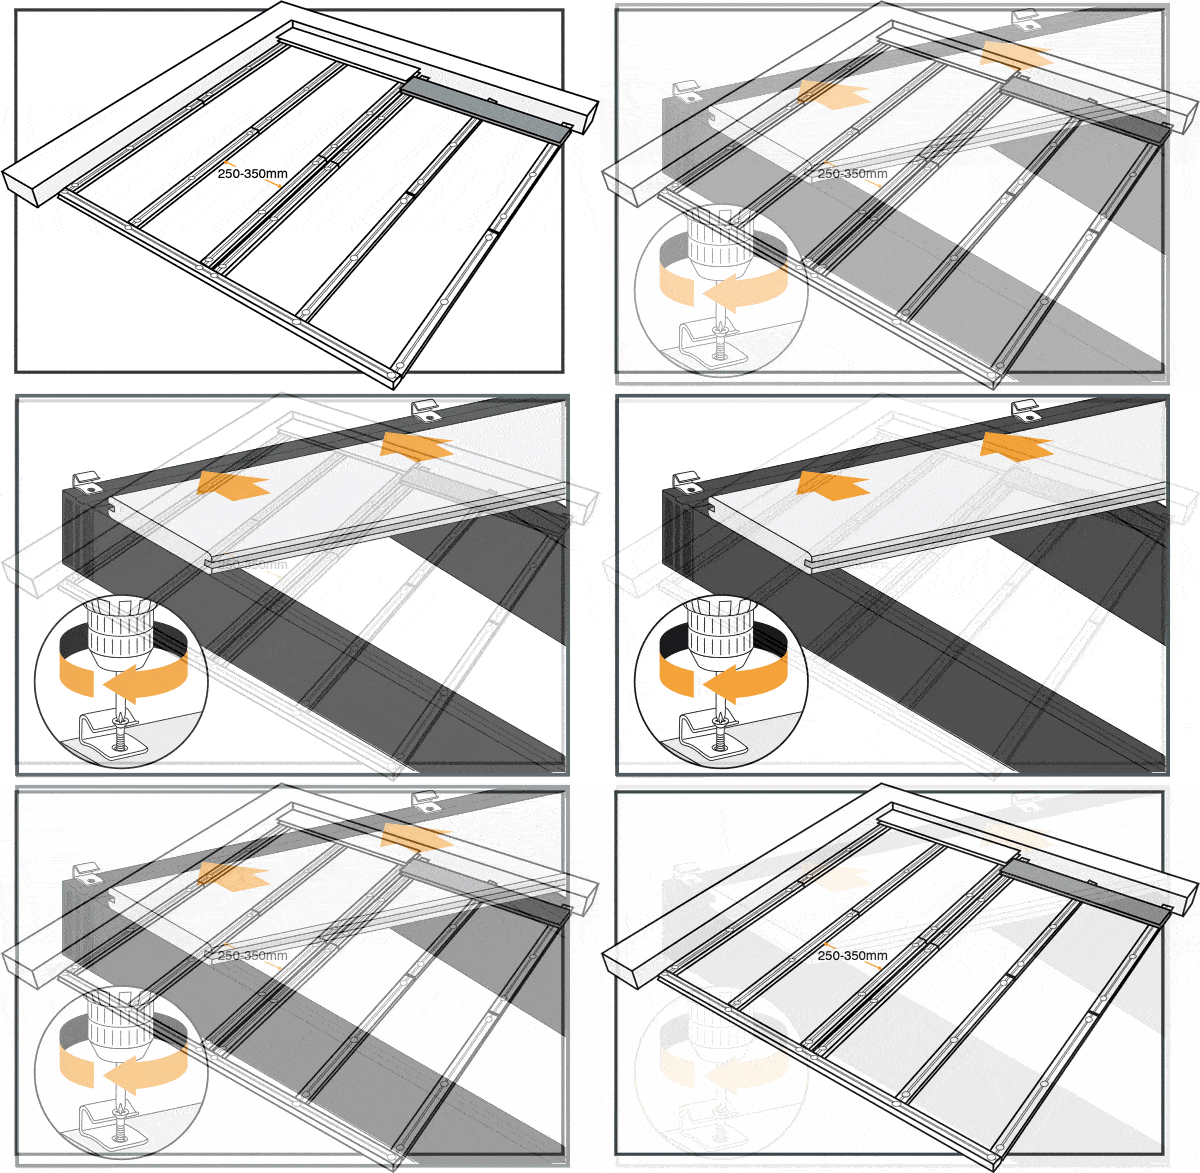
Once your subframe is in place and your joists are laid at 250-350mm spacings, you are set to begin installing your deck boards. Starting at the outside edge of the decking project, begin attaching Starter Clips to the edge of your framework using the steel screws provided. We recommend counter-sinking to assist with the insertion of the screws. Position a Starter Clip at the intersection of each joist to ensure a secure fixing. When all Starter Clips are securely positioned, align the grooved-channel of our deck boards with the opening on the Starter Clip and position securely.
2. Install All Subsequent Boards Using Metal FastClips
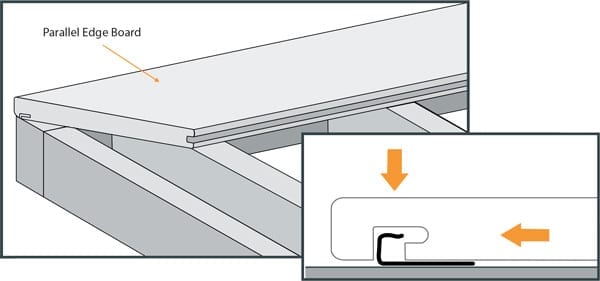
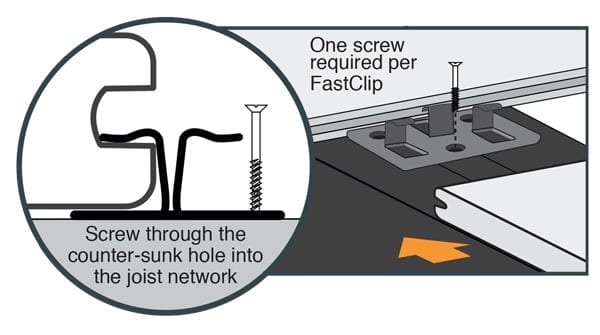
Once your first row of deck boards are in place, use our 3mm metal FastClips to fix all subsequent boards to the subframe. Place the singled pronged side of the metal FastClip into the exposed grooved-channel of the first board. Using one screw, secure the fastening clip into place by screwing through the counter-sunk hole. Attach a FastClip at every intersection between a board and a joist. Line up your second row of boards and align the grooved-channel with the opening of the fixing clip and click into place. Repeat this process to fix and install composite deck boards along the decking area.
Alternative Fixing Using Plastic FastClips
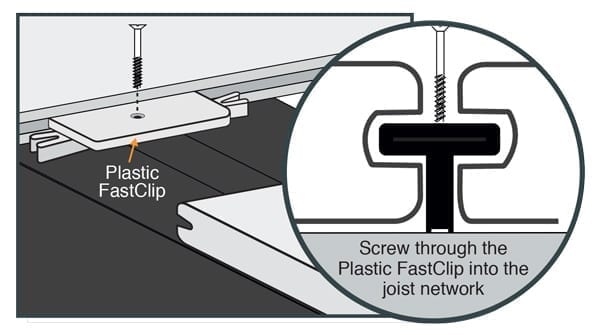
Plastic FastClips can be used as an alternative to our metal FastClips. Aside from having a different fixing method, the same principles should be followed when installing either clip. The benefit of using our 6mm plastic FastClip is that it allows you to access any board along the length of a project without the need to remove the previous run of boards.
3. Attach The Final Board
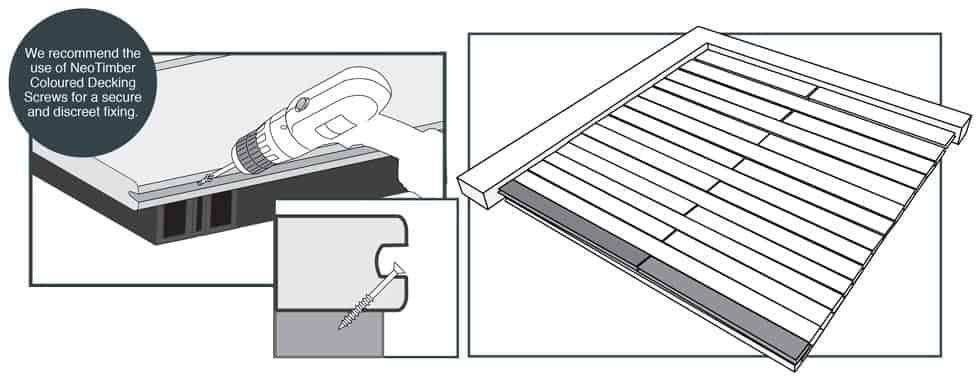
Place the grooved-channel on the inside of the final board into the last row of FastClips. Once secured, pre-drill an oversized pilot hole at a 45 degree angle (when possible) into the grooved-channel on the exposed edge, as per illustrations below. Screw into the joist at 300mm intervals to securely fix the board to the subframe.
Alternative Fixing Method – When the grooved-channel is not fully accessible, screw directly through the top of the board into the joist network. Pre-drill an oversized pilot hole to avoid cracking the deck board.
Fixing Composite Trims
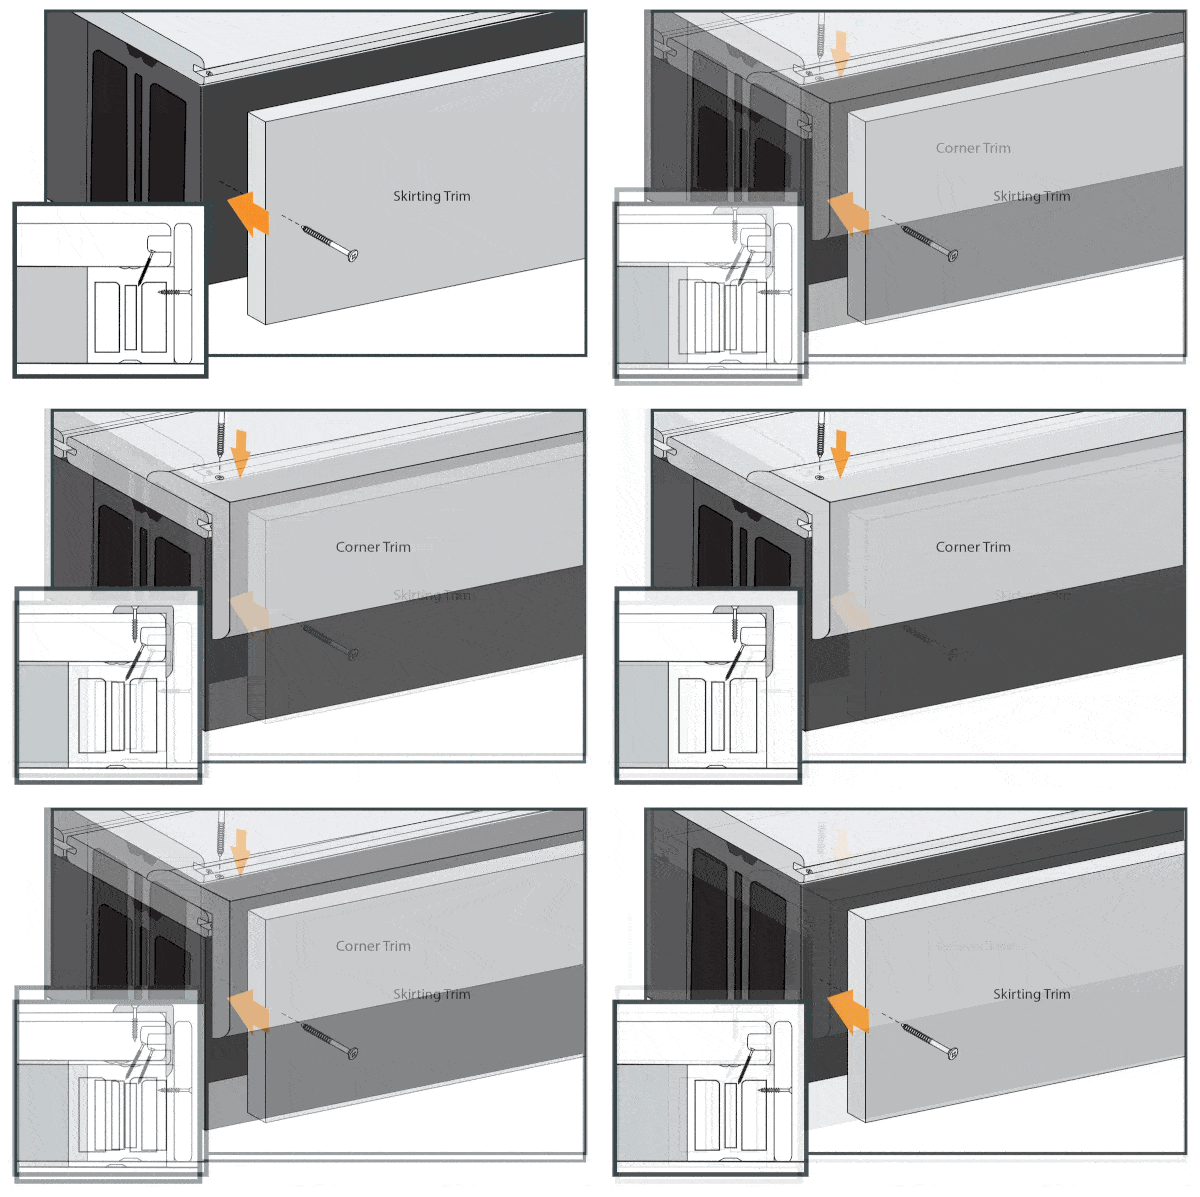
Edges of the deck boards can be finished with either a skirting trim, corner trim or a combination of both. Both the corner and skirting trims can be screwed directly into joists or deck boards. It is advised that before doing so, an oversized pilot hole is drilled into the trim to ensure that it does not split or crack when screwed. We recommend the NeoTimber coloured trim screw for a discreet finish. When joining one trim to another, a minimum gap of 2mm should be left between trim ends allowing for expansion.
